Libretta is a freeware semi-horror puzzle-adventure game by vgperson.
No one read my story.
No one cared for it.
And that is where it ended.
A girl becomes lost during what was only a regular visit to the library.
Guide Libra through. Help her find what she's looking for.
So that no one will have to be lost.
(Content Severity: Mostly Mild)
Click here for content warnings.
Allusions to murder and suicide.
Low-detail sprites of strangled, decapitated, shot, and dismembered corpses.
One possibly-claustrophobic scene.
You can also support this game on itch.io.
Supported Platforms
This game is for Windows only; I have no real way of making a native Mac version. To play on Mac, you can try a general-purpose tool like WineBottler.
Usage Notes
Videos and live streams are allowed.
Troubleshooting
Make sure to extract the game to its own folder instead of running directly from the ZIP file. If you don't do so, any saves made will be lost the next time you run the game.
On Windows 10, the game may fail to start (nothing happens when run). If so, ensure DirectPlay is installed. Go to Control Panel, then Programs and Features. Click "Turn Windows features on or off." There, look under Legacy Components and check DirectPlay. Run the game again, and install DirectPlay when prompted.
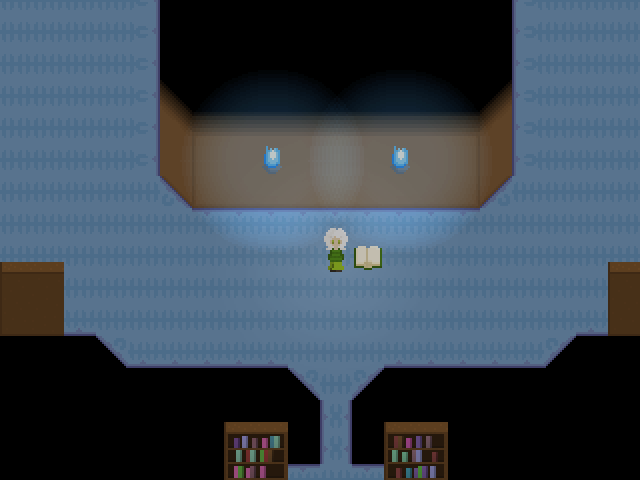
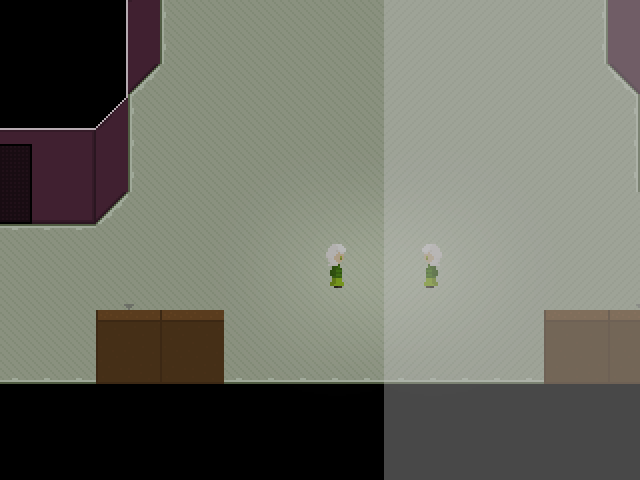
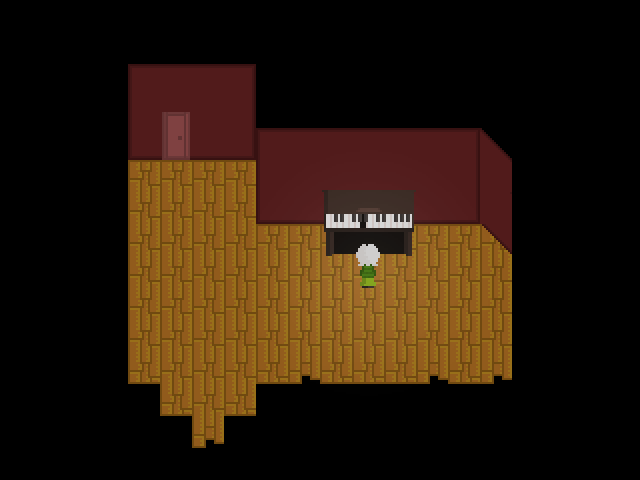
Screenshots
Walkthrough
A walkthrough with puzzle solutions. Contains slight spoilers. It's recommended you check the area for hints first before you consult this.
Walkthrough
Library
Go to the second floor and check the green book on the floor in the bottom area, then walk back.
When you find a black book, read it, walk away so it goes off-screen, and read it again wherever it reappears. Keep doing this, and once it tells you to go UP, walk up off the top of the screen.
Find the path through the blue flames and enter the door.
Fuzzy
Read Chapter 1 in front of you.
Head to the left and follow the path until the room with the icy floor. From the opening, slide right, up, right, up, left, down, left, up, right.
Read the Fear of the Unknown book and run from the fuzzy creature. In the room below the icy floor room, head to the right and read the book at the dead end to create a brick wall. This teaches you how to close books (when you see the folded top-right corner) by pressing X or Shift.
Back in the icy floor room, read the blue book by the bookcase. While on the "it's so, so hot" page (there'll be a "fire" sound, and the book and ice will change color), close the book with X or Shift, and the ice will no longer be slippery. Walk to the other side and read Chapter 2.
After meeting Kelly, read the Dogs and Cats book in the center of the room. Talk to the fuzzy creatures that appear to make them follow you, and lead all of them into either of the red or blue areas below - they'll make a sound when they "enter." Then take the Pencil that appears.
With the Pencil, you can write answers in the riddle books, but this is against the rules. So check the black book near the top of the pets room and use the Pencil to make a revision.
After amending the rules, answer the first riddle book at the bottom of the pets room: "focus." Read Chapter 3 inside the room that it unlocked.
Check the now-slightly-ajar door at the top of the pets room. Read the black book and make note of the year in the prediction. Your answer as to what year it is after reading the black book affects things in the room.
First, answer some year after the stated "year of disaster." Take the faded book that was formerly inside a safe. Then put the book in the Book Revitalizer over on the right. (Its writing will be faded after the year of disaster, but it'll still work.)
Go to a year at least 100 years more than the year when you put the book in to give the machine time to work. Open the Book Revitalizer to get the readable Chapter 4.
The leftmost bookcase in the middle row has directions for a maze. After reading Chapter 4, you can go left to said maze. Follow the directions... most of the way. But when you reach the bottom area and pass under the glasses in the center, head directly up toward the Glasses and take them.
(Exact directions: X marks the start, so start by standing on the red X. Left 3, up 1, left 3, up 6, left 4, down 1, left 6, down 3, left 4, down 13, right 1, down 1, right 7... Then up to the glasses.)
Back in the disaster room, read the black book again; now with the Glasses, it makes the outside exist again. Backtrack to the other riddle book (in the bottom-left) and answer it: "secret." Enter the room and find Chapter 5 in the lower-right, then...
Head to the most bottom-right room; Kelly will guide you toward the right place.
Read the Seasons book in the center and check the vase. The tree changes based on the current season - close the book on the "winter" page. Inspect the dead stump and the shovel to the right, and Kelly will get to work.
Check the book again to change the season to "spring." Pick a Lilycoil from the patch where the tree was, and place it in the vase to make Chapter 6 appear. Read it.
Head back toward the hall below the icy floor room and you'll encounter Kendall. Play Shirigories with her, and either win or lose.
Mirror
Head through the long hall of mirrors. On the left end, use the mirrors' reflections to determine where Chapter 1 is and read it.
Go left from the large room with the dining table. Proceed through all the doors and walk up to the mirror at the end. After the scene, head back to the large room. Go up to the broken mirrors at the top and pull the switch, then go into the lower-left door. Go down and read Chapter 2.
After meeting Mik, check the lower-right door in the large room to receive the S/word. Run into the doppelgangers and mash letters on the keyboard to fight them off. One of them will drop a Key; pick it up and open the lower-right door.
Avoid the doppelgangers (they're restricted to the mirror floor tiles, and only their reflections are visible, so don't let your reflection come near theirs), mashing with the S/word if they catch you. Head down and right.
When you encounter the big mirror, go up to the scales room to get Mik back. Answer the left riddle book: "reflect." Put something on the left side of the scale to actually open the door.
In the room left of the scales, choose the correct phrases in the five books: the ones that have only horizontally-symmetrical letters. (WITH YOU, WITHOUT YOU, MIX TWO, I AM YOU, TO YOU) Check the center book to open the curtains, then read Chapter 3.
Back in the lower room with the big mirror, check the door to have Mik outsmart the computer, then read the BWCW book inside.
After reading Chapter 3 and BWCW, Mik will let you proceed up from the scales room into a maze. Proceed carefully such that neither you nor your reflection steps on any of the X tiles. Afterward, walk back down past the scales room.
(Exact maze directions: Up 6, left 3, down 1, left 2, up 5, right 3, up 4, right 1, up 4, left 2, up 3, left 1, up 2, right 4.)
After the big mirror is gone, go back to the scales room, answer the right riddle book ("image"), and tip the scales to the right by making sure the right side of the scales holds something "heavier" than the left.
In the room right of the scales, choose the correct phrases in the five books: the ones that contain horizontally-asymmetrical letters. (FOR YOU, FORGET YOU, SPLIT TWO, YOU ARE ME, FROM YOU) Check the center book to open the curtains, then read Chapter 4.
Again in the big center room, read the book on the right side to make twins appear. Keep talking to them and asking various questions. Afterward, enter the room and read the GWCW book.
Go right from the right-side room of mirror floors and doppelgangers. Your goal is to make this room the mirror image of the room it matches on the left side; the oval mirror will warp you between the rooms.
In the left-side room, take the book from the tall middle book stack. Use the oval mirror to go to the right side, then place that book on the left stack. Get on the left side of the left bookcase and push it to the right. Lastly, write "ecila" ("alice" backwards) in the brown book. Once you've done all three things to make the rooms match, the chests will pop open.
If you get the Key from the right-side room's chest, the oval mirror will break, and the Key won't fit the door. You'll then have to walk to the left-side room and break that mirror to make it match again, re-opening the left-side chest to get the correct Key. You can skip this by going directly to the left-side chest.
With the correct Key, you can open the door in the right-side mirror floor room. After reading Chapter 4 and GWCW, Mik will let you enter the bottom-right door in the large room. Go down to find Chapter 5. Return to the room's entrance and find Mik hiding over to the right.
Walk right from the large room; the door there will now be unlocked.
In the area with the two statues, pushing one statue makes the other move in the opposite direction. Push the left statue down to uncover a Doll Head underneath the right one.
Check the tile puzzle twice to get Mik to inadvertently find a Doll Torso hiding underneath.
In the light-reflecting area, flip the two rightmost angle mirrors to redirect the light at the rightmost wall mirror; this reflects the beam back at the emitter (the beam will look brighter). Check the emitter (without getting in the way of the beam) to get Doll Limbs from its compartment.
At the back end of the segmented room, read the book in the middle and place the dolls as it describes.
The trick to the puzzle: The descriptions refer to a mirrored view of the dolls - imagine standing in front of the mirror at the back and facing away from it, toward the dolls.
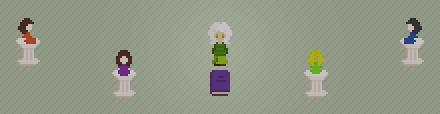
From left to right, the doll positions are: Red (facing right), purple (facing down), green (facing up), blue (facing left). (Picture of final positions.) Read Chapter 6.
After getting the Key from Kim, unlock the door at the top of the large room on the right side and proceed to the stairs.
Journey
Area 1
Keep walking up the stairs until you reach the top. Read Chapter 1. If it isn't clear, you can fall off the edges in this area, so beware.
Enter the room. The piano can be played from anywhere in the room by pressing keys on your computer keyboard (A, B, C, D, E, F, or G). Since the A key is missing from the piano, pressing "A" will make a weird sound; press "A" three times to make a Key pop out. Open the door with it and find Kamille.
Head back outside and go past the girl. Pick up the Leaf and read Chapter 2. Go up the stairs that appear.
Area 2
Check the safe and/or read the note. Return to the piano room and play it again, this time holding down a key (B, C, D, E, F, or G) long enough to create a "whole note" on the piano stand. (Shorter durations result in quarter or half notes with only the first 1 or 2 digits.) Read it to learn the code. Return to the safe and enter the code to get a Flashlight.
Pick up a second Leaf on the branch left from the safe. Be careful with the walkers, who can push you around. Going around and entering from the top side is quite a bit safer.
Enter the dark restroom up and left of the save point. The solar-powered Flashlight weakens with each step you take, and you'll be sent out if it goes fully dark. Head for the top-right stall and flip the light switch to the right of the toilet.
Get the Bucket in the bottom-left stall. Go up to the sinks in the top-left (which you didn't have enough steps to reach with the lights off) and use the Bucket to fill it with water.
Back outside, enter the bathroom to the left. The Plug in the bathtub won't come out unless there's something to drain. So first use the Filled Bucket to fill the bathtub, then pull out the Plug. Use the Plug with the hair dryer for a Key.
Return to the restroom sinks to refill the Bucket, and use it to put out the flames. Read Chapter 3. Cross the bridge that appears.
Area 3
Avoid the sawblades. The tracks are different lengths, so as they bounce back and forth, the distance between them will vary. Wait for the saws to be far apart to slip between them, and also take advantage of safe areas on the side.
Walk past the small building and head right. Continue walking right even as it sends you back to eventually break through the loop and get a Leaf.
Go back to open the small building (using the key from the hair dryer). Whenever you leave the room (there are actually two similar-looking rooms), you'll come out on the "opposite" side.
(For reference's sake, the one you come into first, where the small building is to the right of the saws, is the "left side." The one without a normal connection to the rest of the area, where the small building is to the left of the saws, is the "right side.")
On the "right side," walk up past the small building and head left. Keep walking left until you meet Kamille again. After the scene, take the Salt up above.
Walk back and head up to a pool of water with a puzzle in front. You can attempt to solve the puzzle... but it's not actually possible. Instead, choose "no" to attempting the puzzle, and select the Salt and Filled Bucket to create a Solution.
Once it starts raining, an Umbrella will appear past the saws on the "right side"; go get it. To dodge each saw, wait on one end of the track until the saw reaches the other end, then run across - that gives you the most leeway.
When you return to the "left side" (by entering and exiting the mirror room), the Umbrella will become a Parasol. Give it to the plant to the north to reach Chapter 4. Go up the stairs that appear.
Area 4
Take the left path to find Kamille and finally have her join. Proceed to the top-left and take the Glasses.
Go back down and enter the room to the right of the hourglass. To open the gate, you must place a yellow glass on the left and purple glass on the right. Since you can't combine the colored liquids directly, the trick to the puzzle lies in the mechanics of your inventory.
First, place empty cups on both of the stands (the "glasses" you picked up can "turn into" as many as three empty cups). Use the machine to fill one cup with red and the other cup with blue. Then pick up the red and blue cups. In your inventory, they will combine into Purple Glasses.
Check the right stand again and keep picking "no" - you don't want to place an empty glass, and you don't want to place ONE of the glasses (which will be a red or blue "cup"). When it asks to place the purple glasses (as in eyeglasses tinted purple), say yes.
Once the purple glasses are placed on the right stand, you can place your last empty glass on the left stand and fill it with yellow to open the gate. Pick up the Key.
Back outside, head to the top-right, up past the save point. Check the tightrope, and Kamille will help you cross. Proceed forward and answer the riddle book outside the room: "friend." With that and the key from the filling room, you can open the door.
Inside the room, take the Leaf and read the purple book at the top. Leave and go back to the previously-empty area to the right. As the Leap of Faith book implies, you must jump off the edge on that screen.
Proceed forward and keep reading the books.
Find Kamille at the precipice in the top-left where you found the Glasses.
Enter the filing room, the left room near the Area 4 save point. Look for the LSA file - that is, the game's save file - in the cabinets to get a Nail File.
With the Nail File, Kamille can open the door to the room on the right. Inside, read Chapter 5, then try to exit. During the game, keep checking books (different ones; if you check the same one repeatedly, it'll have the same word), and you'll eventually find an exit.
Outside, head left across the newly-formed bridge. Go inside the house there, check the right bed, and leave to get a Promise.
Going south from the house takes you back to the library room (which you could access from Area 2, though never needed to). Here, you must make Chapter 6 by using the four Leaves and the Promise on the cover in the center.
Leaf locations if you missed any:
1. Area 1, out in the open. It's between the piano room and the safe, near Chapter 2.
2. Area 2, left of the safe. From the Chapter 6 room, just leave and head south on the left side.
3. Area 3, at the end of the endless corridor on the "left side." (The endless corridor on the "right side" had a Kamille scene.)
4. Area 4, inside the double-locked secret room past the tightrope.
Libretta
The path is straightforward. A number of books will require you to provide them the correct items.
- Something missing: Nail File
- Something to hold it all: Bucket
- Something to explore the cave: Flashlight
- Something to defend with: S/word
- Something that's mine: Nail Clippers
- Write my name: Pencil, "Kay"
At the last save point, you must save. Then use the Letter.
Endings
The ending you get simply depends on your reply to Kay. "I believe you" leads to the happy ending and "I don't believe you" to the bad ending.
However, depending on how things went in Journey onward, "I believe you" can flicker to "I...", which will do the same thing as "I don't believe you."
To maximize your ability to choose "I believe you," read all of the fairy tales in the room before the final save, then the book that appears by the stairs to the final save, and say "yes" to all of the questions on the diagonal stairs
There is no third ending
If things have Changed for the worse, forget what you saw, and ignore anything else
Nothing good... will come of witnessing the truth.
An Ends
After Kelly says goodbye... After Mik says goodbye... After Kamille opens her heart to you.
It may not be right, but you can insist on staying with them. That, too, is An End to the story.
An Option
By the time her life's story is in your hands, there's little you can do but proceed ahead.
Still, maybe you could travel back through that story, and find a suitable place for it to go.
There's no turning back... but for the sake of returning to the place everything began, it may just be allowed.
Extra Links
These contain major spoilers for all aspects of the game. Only read after you've beaten it fully.
Author's Afterword
Full Text Script