Misao is a freeware horror adventure game by Sen (Miscreant's Room) made in WOLF RPG Editor.
It's been three months since the mysterious disappearance of Misao.
No one has any idea where she could have gone, but many believe she's dead by now.
And when paranormal events crop up around the school, rumors spread that she's out for revenge...
Warning:
This game contains grotesque imagery and depicts violence, murder, bullying, and sexual assault. Be warned that there are also many scenes in which characters do and say unpleasant things.
Playing this game is strictly forbidden for those unable to make a clear distinction between reality and fiction.
(Content Severity: Discretion Highly Advised)
Click here for more detailed content warnings.
Blood, gore, and murder.
Body horror (especially dismemberment).
A scene involving sexual assault of a young girl.
Bullying.
Death.
Download Misao 3.03 | (Mirror)
(Chrome may falsely flag the download as malicious, but it's safe to ignore.)
A remastered version of Misao is available on Steam for $10.
The original version will remain free here, but you can show Sen your support by purchasing the remaster.
Supported Platforms
The game's engine is made for Windows only, with no native support for other platforms. To play on Mac, you can try a general-purpose tool like WineBottler.
Usage Notes
Videos and streams are allowed, but should not be monetized. Including the game's title and linking the game page/store page in any videos of it is appreciated.
Troubleshooting
Make sure to extract the game to its own folder instead of running directly from the ZIP file. If you don't do so, any saves made will be lost the next time you run the game.
If the game freezes your computer on startup, it's likely caused by a problem with auto-installing fonts. Go into the Data folder, install all of the fonts, then delete the font files and try running the game again. It's supposed to install them automatically, but this seems to freeze some systems - deleting the fonts will stop it from trying.
If dialogue doesn't show up or uses the wrong font (which may cause cutoff text), manually install the fonts in the Data folder.
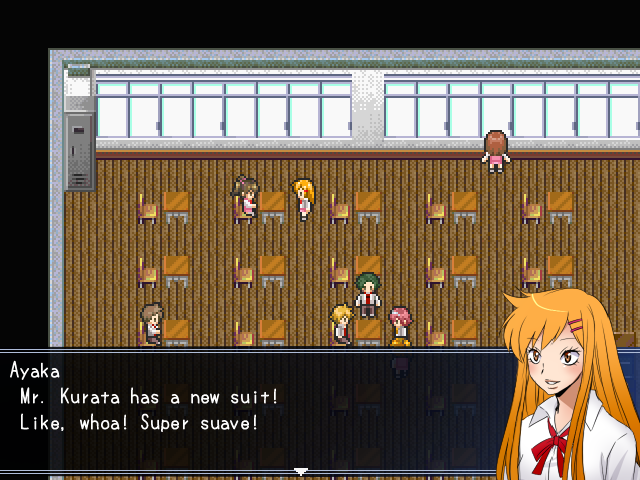
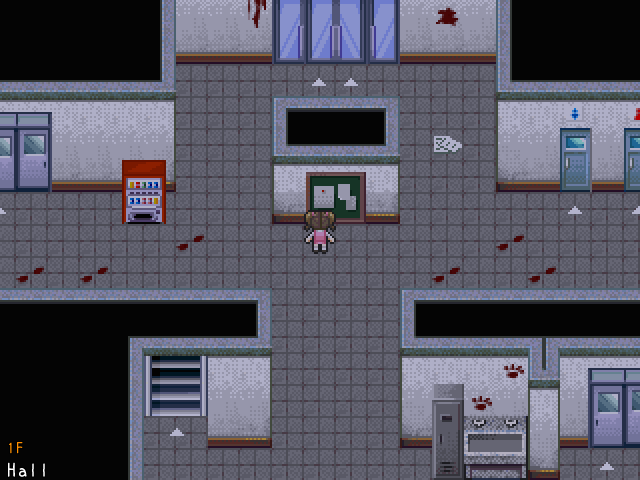
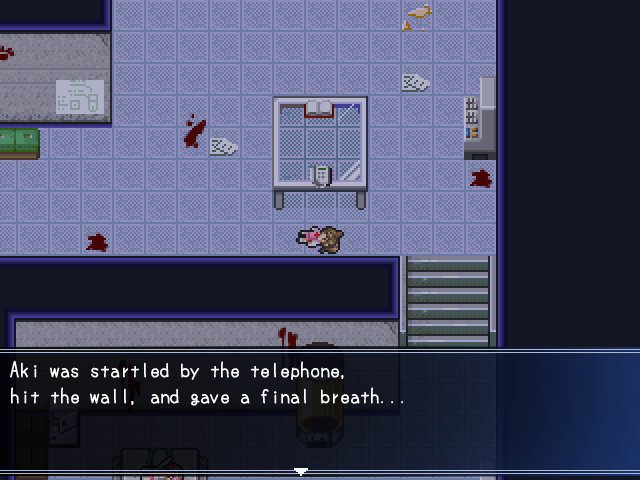
Screenshots
Walkthrough
The main goal of Misao is to collect six key items to offer at an altar. You can go for them in pretty much any order, so it makes most sense to give the steps for getting each item.
I spoiler-tagged a few of the puzzles; click or highlight the black boxes to show the spoiler text. Remember you can get hints in the 2F Library, so I suggest looking at those before you consult this walkthrough.
Walkthrough (Free Version)
Brain
Go to Class 2-A (2F) and free Kurata from the locker.
Examine the locker Kurata was in to find a Locker Key.
Go to the 1F Staff Room and use the key to open the lockers there.
Head
Go through the scene with Yoshino in the 1F Science Lab. You'll end up covered in blood.
Get the Bat from the locker in the 1F Hall.
Go outside from 1F to the Abyss and go down the well.
Smash the boulders with the Bat, but be careful...
There are secret hiding spots in the sides of the hallway. After smashing the third boulder, run back and hide in them.
Step into the water to wash off the blood. The way will then open.
Eyes
Get the Lilies from the 2F Library.
Examine the blackboard in the 1F Hall for a hint on what to do with the Lilies.
Go to Class 2-A (2F), 2-B (2F), and 3-C (3F) and check the corresponding desks (marked A, B, and C) to find vases. Put Lilies in each.
After all the spots have been adorned, go to the Rooftop from 3F.
Arms
After freeing Kurata from the Class 2-A (2F) locker, go to the 1F Infirmary.
Go to the 1F Staff Room and look for the tranquilizer as instructed, then return to the 1F Infirmary.
Legs
Get the Bat from the locker in the 1F Hall.
Go to the 3F Principal's Office and smash the vase with the Bat for the Emergency Exit Key.
Go to the right 2F hallway and use the key in the room ahead.
After the scene, go to the 1F Boys' Bathroom and open the car door.
Heart
Go into the Girls' Bathroom and knock on the far-right door three times.
Flush the toilet in the stall that opens, then get around Hanako to get Coins from the other toilet.
(If you're having trouble with Hanako, try luring her to one side, wait for her "dash," and then run past on the other side.)
Use the Coins in the 1F Hall vending machine to get Pocari Sweat.
Go into the 1F Boys' Bathroom to see a scene with Saotome and Tohma.
Find Tohma in Class 3-C (3F). Take him to the 2F Library.
Give Tohma the Pocari Sweat to get the Small Key.
Check the capsule containing the mandrake in the 1F Science Lab to release it.
Read the note on the table about salt mandrakes.
Get Salt from the mandrake. Guide it right below the telephone to make it faint from fright.
Place Salt on the floor in the left 2F hallway (in the place where the spirit appears) to stop the looping.
In the 2F Music Room, sit still in the chair and listen.
Use the Small Key to open the chest for the Boot Disc.
Use the Boot Disc on the upper machine in the 1F Science Lab. There's a hint for the password nearby.
The first password is 78450.
Go around the capsules and input another password on the terminal there.
The second password is 31269.
Ending
Once you have all the parts, go to the Altar outside, place the parts, and inspect the lantern at the top.
Return to Onigawara to find out the last thing you need to do.
Make your choice, use the Bat, then return to the Altar.
Truth
The true ending is rather straightforward, so I don't think a walkthrough is necessary.
The secret password it asks for at the end can be learned by talking to Onigawara and choosing the invisible third option.
If you don't want to go back to find it, it's ABANDONHOPE in all caps.
Walkthrough (2024 HD Remaster)
Cracked Cellphone
Go to Classroom 2-B (2F, right hall) and free Kurata from the locker.
Examine the locker Kurata was in to find a Locker Key.
Go to the 1F Faculty Room (left door). Talk to Ayaka while you're here, and go left into the Locker Room.
Use the key to open the leftmost locker (avoiding the blood spot).
Muddy Boots
Head to the 2F Laboratory (keep going right). Pick up the CD-ROM and leave.
Go to the 3F Computer Room (top-left door). Leave and grab the fire extinguisher in the hall.
Afterward, check the computer with the red screen.
Use the CD-ROM on the other glowing computer and deactivate the security.
Return to the 2F Laboratory. Go down a room to find Yoshino. Try to help her.
Try to hide in the shelves by the top wall, then give up and take the Scalpel inside.
Use the Scalpel on the bear costume, then hide inside.
Afterward, check the glowing object where Yoshino was.
Back in the top part of the laboratory, check the control console in the center. Select Mandrake Bomb to open its capsule, then take it with you.
(Note: When you're all bloody, the fire shutter in 2F Hall (Right) will trigger just by walking over it, so make sure to go around via the classroom.)
Go down to 1F and exit north to the Courtyard.
Walk into the water to wash off the blood and unlock the altar door.
Get the Metal Bat from 1F Classroom 1-A.
Go downstairs from 1F to the Caves.
Stand below the two mushrooms, go down 3 steps, and check the ground to get the Plant Enrichment and open the path forward.
When you encounter boulders, place the Mandrake Bomb, hit it with the Metal Bat, and run away.
Continue along avoiding danger. At the cliff edge, walk in front of the single mushroom and jump off there.
Torn Ribbon Tie
Get the Seeds from the bag on the Rooftop.
If you didn't already, get the Plant Enrichment from the Caves (3 steps down from the two mushrooms).
Plant the Seeds in the flowerpot in Library's room (connected to the 2F Library).
Use the Plant Enrichment on the Seeds. Move the clock hands to make them grow, and pick the Purple Lilies.
Go to the 3F Art Room (bottom-left door) and use the Purple Lilies on the set of paints to make them White Lilies.
Afterward, run out of the room, then to another exit, because the monster also follows you into 3F Hall.
Get the Board Notice from the 1F Hall for information on what to do with the White Lilies.
Go to Classroom 1-A (1F), 2-B (2F), and 3-C (3F), and at the corresponding desks (marked A, B, and C), place a lily.
(Note how the orientation differs. Use the teacher's desk as a reference for how to rotate it.)
After all the spots have been adorned, go to the Rooftop and talk to the girls.
Mysterious Bundle
After freeing Kurata from the 2F Classroom 2-B locker, as well as talking to Ayaka in the 1F Faculty Room, go to the 1F Infirmary.
(Note that if you're still bloody from the Yoshino event, you should wash off in the Courtyard before seeing Kurata.)
Go to the 1F Faculty Room and check Kurata's desk (the top-left one). Then return to the 1F Infirmary.
Snapped Hairtie
If you haven't already, get the Metal Bat from 1F Classroom 1-A.
Go to the 4F Principal's Office and smash the vase with the Metal Bat for the Emergency Exit Key.
Go to the right on 1F. Walk down the hall without "looking back" (taking a step downward), ignoring the illusion of Misao, and use the Emergency Exit Key on the door.
In the Gymnasium, don't try to help Kudoh. After the scene, check Kudoh's spirit, follow it up to 3F, and talk to it by the hole to the right.
Red Blazer
Go into the 1F Girls' Bathroom and knock on the right door three times.
Try to leave, and Hanako will appear. (You can leave and quicksave outside at this point to make attempts quicker.)
Wait for her to "dash," then run past her while she's hopping in place. Get to the right toilet and grab the Coins.
Use the Coins in the 1F Cafeteria vending machine to get a Sports Drink.
Find Tohma in the 1F Boys' Bathroom (after the 3F Computer Room scene).
Leave, then take him to Miss Library in the 2F Library. (You have to befriend and name her if you haven't already.)
Once Tohma is in the bed, give him the Sports Drink to get the Small Key.
If you haven't deactivated the laser in the 2F Laboratory or done the Yoshino event, see the start of Muddy Boots.
In 2F Laboratory, check the control console (which turns on after the Yoshino event) and select Salt Mandrake to release it from the capsule.
Guide the Salt Mandrake right below the telephone (and beware of it yourself) to make it faint from fright, then pick it up.
Take the Salt Mandrake to the 1F Cafeteria and use it with the electric grater in the kitchen to get Salt.
Place the Salt on the floor in the left 2F Hall (in the spot where the little girl spirit appears) to stop the looping.
In the 2F Music Room, walk into the top-left desk chair and sit still until the end of the performance to get the Locked Box.
Use the Small Key to open the Locked Box and get the Warding Bell.
Go to the 2F Laboratory and go behind the capsules - the spirit will be scared off by the Warding Bell.
In the Doll Room, take the Red Blazer from the top-right doll.
Ending
Once you have all the key items, enter the Altar in the Courtyard, and offer up the six keys.
Return to Onigawara (at the Entrance Hall or Student Council Room) to find out the last thing you need to do.
Sacrifice either Tohma (in Library's room) or Kurata (in the Infirmary), then return to the Altar.
(If playing the male protagonist, you must try to sacrifice one, return to the Altar, choose who to save, then return to the Altar once more.)
Walkthrough (Definitive Edition)
Cracked Cellphone
Go to Classroom 2-B (2F, right hall) and free Kurata from the locker.
Examine the locker Kurata was in to find a Locker Key.
Go to the 1F Faculty Room (left door). Talk to Ayaka while you're here, and go left into the Locker Room.
Use the key to open the leftmost locker (avoiding the blood spot).
Muddy Boots
Head to the 2F Laboratory (keep going right). Pick up the CD-ROM and leave.
Go to the 3F Computer Room (top-left door). Leave and grab the fire extinguisher in the hall.
Afterward, check the computer with the red screen.
Use the CD-ROM on the other glowing computer and deactivate the security.
Return to the 2F Laboratory. Pick up the Plant Enrichment that falls off the shelves.
Check the test-tube with the black mandrake to get the Mandrake Bomb.
Go down a room to find Yoshino. Try to help her.
Try to hide in the shelves by the top wall, then give up and take the Scalpel inside.
Use the Scalpel on the bear costume, then hide inside.
Afterward, check the glowing object where Yoshino was.
(Note: When you're all bloody, the fire shutter in 2F Hall (Right) will trigger just by walking over it, so make sure to go around via the classroom.)
Go down to 1F and exit north to the Courtyard.
Walk into the water to wash off the blood and unlock the altar door.
Get the Metal Bat from 1F Classroom 1-A.
Go downstairs from 1F to the Caves.
When you encounter boulders, place the Mandrake Bomb, hit it with the Metal Bat, and run away.
Continue along avoiding danger. At the cliff edge, walk in front of the single mushroom and jump off there.
Torn Ribbon Tie
Get the Seeds from the bag on the Rooftop.
If you didn't already, get the Plant Enrichment from the 2F Laboratory - it falls off the shelves after passing where the laser was.
(And if the Laboratory laser is still active, see the start of Muddy Boots for deactivating the security.)
Plant the Seeds in the flowerpot in Library's room (connected to the 2F Library).
Use the Plant Enrichment on the Seeds. Leave the room, re-enter, and pick the Purple Lilies.
Go to the 3F Art Room (bottom-left door) and use the Purple Lilies on the set of paints to make them White Lilies.
Afterward, run out of the room, then to another exit, because the monster also follows you into 3F Hall.
Get the Board Notice from the 1F Hall for information on what to do with the White Lilies.
Go to Classroom 1-A (1F), 2-B (2F), and 3-C (3F), and at the corresponding desks (marked A, B, and C), place a lily.
(Note how the orientation differs. Use the teacher's desk as a reference for how to rotate it.)
After all the spots have been adorned, go to the Rooftop and talk to the girls.
Mysterious Bundle
After freeing Kurata from the 2F Classroom 2-B locker, as well as talking to Ayaka in the 1F Faculty Room, go to the 1F Infirmary.
(Note that if you're still bloody from the Yoshino event, you should wash off in the Courtyard before seeing Kurata.)
Go to the 1F Faculty Room and check Kurata's desk (the top-left one). Then return to the 1F Infirmary.
Snapped Hairtie
If you haven't already, get the Metal Bat from 1F Classroom 1-A.
Go to the 4F Principal's Office and smash the vase with the Metal Bat for the Emergency Exit Key.
Go to the right on 1F. Walk down the hall without "looking back" (taking a step downward), ignoring the illusion of Misao, and use the Emergency Exit Key on the door.
After the Gymnasium scene, check Kudoh's spirit, follow it up to 3F, and talk to it by the hole to the right.
Red Blazer
Go into the 1F Girls' Bathroom and knock on the right door three times.
Try to leave, and Hanako will appear. (You can leave and quicksave outside at this point to make attempts quicker.)
Wait for her to "dash," then run past her while she's hopping in place. Get to the right toilet and grab the Coins.
Use the Coins in the 1F Cafeteria vending machine to get a Sports Drink.
Find Tohma in the 1F Boys' Bathroom (after the 3F Computer Room scene).
Leave, then take him to Miss Library in the 2F Library. (You have to befriend and name her if you haven't already.)
Once Tohma is in the bed, give him the Sports Drink to get the Small Key.
If you haven't deactivated the laser in the 2F Laboratory or done the Yoshino event, see the start of Muddy Boots.
In 2F Laboratory, check the glowing screen (it turns on after the Yoshino event) to release the Salt Mandrake from the capsule.
Read the note on the table about Salt Mandrakes for a hint.
Guide the Salt Mandrake right below the telephone (and beware of it yourself) to make it faint from fright, then pick it up.
Take the Salt Mandrake to the 1F Cafeteria and use it with the electric grater in the kitchen to get Salt.
Place the Salt on the floor in the left 2F Hall (in the spot where the little girl spirit appears) to stop the looping.
In the 2F Music Room, walk into the top-left desk chair and sit still until the end of the performance to get the Locked Box.
Use the Small Key to open the Locked Box and get the Warding Bell.
Go to the 2F Laboratory and go behind the capsules - the spirit will be scared off by the Warding Bell.
In the Doll Room, take the Red Blazer from the top-right doll.
Ending
Once you have all the key items, enter the Altar in the Courtyard, and offer up the six keys.
Return to Onigawara to find out the last thing you need to do.
Sacrifice either Tohma (in Library's room) or Kurata (in the Infirmary), then return to the Altar.
(If playing the male protagonist, you must try to sacrifice one, return to the Altar, choose who to save, then return to the Altar once more.)
Master of Deathtraps / Dropout List (Definitive / 2024 HD)
Thorned Rose
4F Principal's Office: Inspect the rose vase (before breaking it).
Spirits' Temptation 1
Rooftop: Walk to the edge where the shoes are (before placing the White Lilies).
Spirits' Temptation 2
1F Hall (Left): Get grabbed by the corpse who falls.
Cursed Desk
3F Classroom 3-C: Check the desk in the middle with bloody writing on it.
Bogus Door
3F Classroom 3-C: Go out the right-side exit.
The Library Killer
2F Library: In your first meeting with Library, refuse to be her friend twice.
Pancake
2F Library: Read the note between the bookshelves in the top-left.
Lazy-Eyed Ranger
2F Library's Room: Check the bookshelf in Miss Library's room and choose not to read the book.
Blood Wall
1F Hall (Central): Check the wall that blood drips down from.
Locker 1
1F Locker Room: Step on the bloody mark in front of the locker.
Locker 2
1F Locker Room: Push the fallen locker off into the abyss and stand still.
Hanako of the Toilet
1F Girls' Bathroom: Get caught by Hanako.
Lunchtime
1F Cafeteria: Eat the food.
Anatomical Model
1F Infirmary: Take a nap in the top bed.
Measuring Up
1F Infirmary: Stand on the measuring scale for a few seconds.
Engulfing Darkness
1F Classroom 1-A: Walk over the moving hole.
Hall of Death
1F Hall (Right): Turn back toward the doll.
Sharp Glass
2F Hall (Left): Walk by the cracked window.
Broken Fire Door
2F Hall (Right): Check the red switch (or, while all bloody, just walk over the line).
Kurata's Attack
2F Classroom 2-A or 1F Infirmary: While covered in blood, free Kurata from the locker in 2-A or see him in the Infirmary.
Trip Laser
2F Laboratory: Walk into the laser before disabling the security.
High Security
3F Computer Room: With the CD-ROM, choose to increase security.
Call of the Reaper
2F Laboratory: Walk in front of the phone on the table.
Test-Tube Spirit
2F Laboratory: Walk behind the test-tubes with the floating head (before getting the Warding Bell).
Mystery Drink
2F Laboratory: Drink the drink on the table.
Shelves' Shadow
2F Science Room: During the hiding scene, hide below the shelves to the right.
Long Way Down
2F Science Room: During the hiding scene, jump in the hole to the left.
Mimicry
2F Science Room: During the hiding scene, hide between the anatomical model and skeleton.
Test Subject
2F Science Room: During the hiding scene, hide in the test-tube.
Cardboard Box
2F Science Room: During the hiding scene, hide in the open cardboard box.
Left Exposed
2F Science Room: During the hiding scene, insist on hiding in the shelves at the top.
Mandrake Bomb
Underground Cave (Boulders): After hitting the Mandrake Bomb with the Metal Bat, don't run away.
Play It Again
2F Music Room: Play the piano.
Stop the Music
2F Music Room: Leave your seat mid-performance.
Awakened Doll
2F Doll Room: After entering the back room, walk past the middle table, then check the doll lying down after she opens her eyes.
Kudoh in Crisis
1F Gymnasium: Save Kudoh.
Deadly Canvas
3F Art Room: Check the black canvas on the left.
Busted
3F Art Room: Get caught by the bust after painting the lilies.
To the Bone
Underground Cave (After Using Bomb): Follow the zombie into the crevice.
Preyed Upon
Underground Cave (After Using Bomb): Get caught by the zombie that comes out of the water.
Slipped
Underground Cave (Cliff Edge): Walk down off the edge (at the incorrect position).
Tombstone
Courtyard: Read the rightmost of the three graves.
Li'l Miscreant Avatar Locations (2024 HD Remaster)
Note that Li'l Miscreant is only visible/interactable while using the Crimson Eyes. Also, there are short in-game hints for avatars you haven't found.
- Aki: 4F Hall, outside the door to the Principal's Office.
- Misao: Courtyard; hit the top-left tree with the Metal Bat.
- Tohma: 3F Hall, down in the small hole left of the stairs to 4F.
- Yoshino: 2F Hall, the right hallway before the Laboratory, inside the right locker.
- Kudoh: 1F Gymnasium, under the right cone on the stage.
- Saotome: 3F Art Room, on the chalkboard.
- Ayaka: 3F Music Room, on the music stand to the left.
- Kurata: 1F Faculty Room, near Kurata's desk after Ayaka leaves. You must then approach from behind.
- Library: 2F Library's Room, inside the casket by her bed.
- Onigawara: 1F Hall; from the Courtyard entrance, follow the footprints that appear.
- Mandrake: Caves (entrance area), appearing as an extra mushroom hiding with the single one at the top.
- Aki (2): 2F Doll Room; press the hidden switch on the left wall behind the guillotine. Take the Doll Room Key from the nun and use it to open the back door. Read the writing on the back of the glass.
Music
Below are all the songs in the game and their sources. Note that there may be some spoilers in the track names.
Do not reupload these songs elsewhere without permission from their respective creators.
Song List
| Name | Usage | Source Link |
|---|---|---|
| Death of London | Misao's Theme | Source |
| Tin Coffee Maker | Library | Source |
| Invitation | Game Over | Source |
| Secret Maneuvers | Other World Halls | Source |
| Sundial Hill | Classroom | Source |
| Fruit Store | True Ending Scenes | Source |
| Irrational Compression | Bonus Room | |
| I'm Not Myself When I'm Not Me -Version 2- | Kurata's Truth | |
| Piano 09 | My Piano | Source |
| Piano 10 | Her Piano | Source |
| Kagome Kagome | Hall of Death | Source |
Translation Notes
(These contain spoilers for all aspects of the game. Only read after you've beaten it fully. Also covers Mad Father.)
Original Author: Sen
Site: http://novice2.web.fc2.com/game/misao/index.html
Email: seeen*outlook.com (* to @)