
Pharmacist-in-training Pia departs from her home town, determined to cure a disease striking the town of Port Fina.
Upon arrival, she can't help but notice a giant landmass floating in the sky above the town: the Faraway Continent.
To her surprise, the townspeople think little of the continent, though many rumors exist about what might be there.
What begins with Pia running a little item shop on the hill
ends up as a story spanning many faraway places and times...
Faraway Story is an action RPG made by Fantasy Factory in Wolf RPG Editor.
As the story progresses, you fight through both randomized and pre-designed dungeons using a multitude of weapons and spells. You can also gather and create many items via alchemy, either for your own use or to put on sale at your own shop.
Note:
The game is complete in a sense, but has an extensive "post-game" planned. One entire scenario, Part 1, is fully playable (and approximately 25 hours long).
However, a second (of theoretically comparable length) is still in the works, and does promise a true conclusion to the story. Version 0.76 contains five full chapters of the Part 2 scenario. It could be a long time before Part 2 is fully complete.
(Content Severity: Very Mild)
Click here for content warnings.
Two pictures (one in a Chapter 6 mission, one in Chapter 8) with partially nude (but covered) characters.
Very minor instance of blood.
Download Faraway Story 0.76.06 | (Mirror)
(Chrome may falsely flag the download as malicious, but it's safe to ignore.)
Supported Platforms
The game's engine is made for Windows only, with no native support for other platforms. To play on Mac, you can try a general-purpose tool like WineBottler.
Troubleshooting
Make sure to extract the game to its own folder instead of running directly from the ZIP file. If you don't do so, any saves made will be lost the next time you run the game.
If the game freezes your computer on startup, it's likely caused by a problem with auto-installing fonts. Go into the Data folder, install all of the fonts, then delete the font files and try running the game again. It's supposed to install them automatically, but this seems to freeze some systems - deleting the fonts will stop it from trying.
If dialogue doesn't show up or uses the wrong font (which may cause cutoff text), manually install the fonts in the Data folder.
Screenshots

Guides
General advice and information, most notably a bunch of data to help with locating items.
Guides
Raw Item Dumps
To serve as a resource for finding items, I've dumped a bunch of item data in two formats.
Item Lists
This one contains raw tables for all possible item sources.
Use this if you want to search for a source of items and see what items you can get from that source.
Item Finder
This one lists all items and monsters with the places you can obtain and find them.
Use this if you want to search for an item/monster and see where you can get/fight it.
Note that these dumps may have a few weird things in them, like listing recipes for items which are impossible to get recipes for. They may also include some things that can't be seen/attained in the current version, but I've made an effort to exclude those.
Mission Mechanics
In general, missions aren't missable - they stick around until you beat them. There are a few exceptions; A Plea To Pia! isn't available while Marinet isn't around, and naturally, Part 2 clears out all Part 1 missions.
Missions appear once you reach a designated chapter and have cleared any prerequisite missions.
Missions are listed in the walkthrough based on the former - so the earliest point they'll appear, basically.
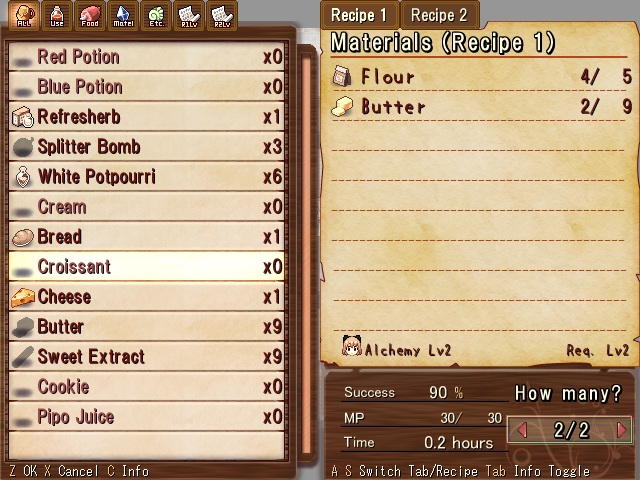
Alchemy Mechanics
Success of alchemy is decided by generating a random number from 0 to 99.9, adding the success rate, and deciding it to be a success if it's 100 or more. (So 0% will definitely never succeed, as you'd expect.)
The random seed is remembered in the save file, meaning you always get the same result if you reload. Thus, it's not super easy to save-scum success out of a recipe with a low success rate. However, you can still easily change the seed until it's favorable by alchemizing other things (regardless of success or failure), or doing anything else that calls for random numbers (like entering a randomized dungeon).
Experience Mechanics
EXP gained from alchemy and forging is based on the rank of the item being made. It's roughly 80% of the rarity cubed, with H equating to rarity 1, G to 2, F to 3, E to 4, D to 5, C to 6, B to 7, and A to 8.
The formula for shop EXP is more complicated, but it's a relationship involving the rarity cubed and the "demand" (an unchanging value specified for each item). The lower demand an item has, the more EXP you get for managing to sell it.
There are many factors considered for how customers behave - customer preferences, regional demand for each item, a random "item of the day," bonuses if your selection meets specific requirements - but honestly, it's difficult to purposefully take advantage of any of that stuff.
Music Sheets
Fenny's Shop
Chapter 1+
- Title
- A New Chapter
- Sound of Piano
- Event BGM
- Port Fina
- Port Fina: Night
- Port Fina: Map
- Port Harbor
Chapter 2+
- Quiet and Serious
- Serious
Chapter 3+
- Finstaria
- Finstaria: Night
- Finstaria: Map
Chapter 4+
- Erance
- Erance: Night
- Erance: Map
Chapter 5+
- Northyne
- Northyne: Night
- Northyne: Map
- Northyne Harbor
Chapter 6+
- Erance Castle: Barracks
- Erance Castle: Court Ward
- Erance Castle: Peace
Chapter 7+
- Faraway Continent
- Faraway Continent: Night
Chapter 8+
- Past Archive
- Flashback
- Sun God's House
Chapter 11+
- Normal Battle
- Boss Battle 1
- Boss Battle 2
- Boss Battle 3
Chapter 12+
- A Quiet New Chapter
- Good Night
- Fanfare
- Fanfare 2
- Grand Fanfare
Other
| Location | Song |
|---|---|
| Initial | Tending the Shop! |
| Port Coast: Final Area | Port Coast |
| Windy Crossroads | Windy Highway |
| Forest of Death 02 | Romack Woods |
| Capital City Bar (Chapter 4/13 At Night) | Fenny's Song |
| Whitelands 05 | Whitelands |
| Distorted Room (Chapter 6+) | Game Over |
| Cleri Road (Upper Cliff) | Cleri Road |
| Dragon's Step 03 | Finstaria Grasslands |
| Perplexing Waterside | Perplexing Waterside |
| Sage's Path 20 | Sage's Cave |
| Continent Study (After Part 1 Ending) | Ending |
| Continent Study (After Defeating Ellevark) | Soundtrack |
| Sage's Path 07 (Part 2) | Sage's Path |
| Sage's Chamber (Part 2) | Sage's Chamber |
| Wheat Fields | Wheat Fields |
| Lux Plains: Final Area | Belk Plains |
| Steep Mountains 04 | Valgido's Domain |
| Forbidden Mine: Final Floor | Rand Mountains |
| Sacrifice Cave 02 | Crystal Cave |
| Sea of Memory 02 | Outside Ragnarok Ruins |
| Ragnarok Ruins: Room | Ragnarok Ruins |
| Thieves' Hideout: Passage (Over-Water Boots) | Thieves' Hideout |
| Memoril Highway (Over-Water Boots) | Memoril Highway |
| Lux Mountains 03 | Lux Mountains |
| Whiteflower Field: Swamp Region (via Lone Tree) | Whiteflower Field |
Walkthrough
A basic walkthrough for the main plot and missions/sidequests. It doesn't give much battle advice. Beware of spoilers!
Walkthrough
Part One
Chapter 1
Main Plot
Go to Rune Hill to find Pia's new home. Leave the house to find Marinet outside.
Go downstairs to plan opening the shop. Go to the Bar for info.
Leave town and go to Memoril Highway (the right dot) and proceed right to Belk Plains. Either enter Belk Plains normally or use the Plains Map. Obtain 2 Shamia Grasses and a Popplo Fruit. You can just return to the entrance once you're done.
Go home and use Pia's pharmacy table (Alchemy) to make at least one Refresherb. Go downstairs and open the shop (sleeping until morning if it's too late to do so).
Go to the Town Entrance after visiting Belk Plains to bump into Karlo. On your first visit to the Central Plaza, you'll meet Fenny. On your second visit to Central Plaza, you'll talk with some NPCs about the Faraway Continent.
18 hours after first opening the shop (as long as you've seen certain side-scenes), there'll be a scene at the shop. Go to the Library to decide that searching it is better left for later. Go to the Bar to talk with Karlo. Go to Central Plaza to meet Fenny and get a fortune.
After seeing the three scenes around town, return home for a scene. Go to the Library to inspect it fully, then you'll get a visit from Karlo the next day.
Use the Herb Plains Map at Belk Plains. Go through Herb Plains and beat the boss. (It's easy thanks to Marinet wrecking it.)
As Karlo, talk to all the people and leave the harbor. As Marinet, proceed up and left.
Back with Pia, go outside the house to find a letter. Go to Ellevark's House in the Residential District. Return to Ellevark's House after Pia storms out.
Side Events
Visit the weapon shop with Marinet for an event.
Visit the general store with Marinet for an event.
After bumping into Karlo and making a Refresherb, return to the Town Entrance for a conversation with Marinet.
Missions
Upon returning to Pia's room after the first visit to the bar, Marinet will instate the Mission Board.
A Plea to Pia!
The recipe for Pudding is 1 Egg, 1 Milk, and 1 Sweet Extract. You need enough to make two.
Eggs and Milk can be bought from the general store, but Sweet Extract must be made via recipe. The Sweet Extract recipe is sold at the library, and requires 2 Pipo Berries or 1 Overripe Fruit, both of which are obtainable in Belk Plains.
Keep in mind the success rates of recipes; your chances of actually making an item improve as your Alchemy level increases. Once you have 2 Puddings, choose the "A Plea to Pia! (Report)" mission to turn them in.
Chapter 2
Main Plot
Go to Ellevark's House, and after getting a brief lesson, ask him to help look for Marinet.
Go to Memoril Highway and head north to open the path to Port Coast. Collect 5 Sparkling Sands and return to Ellevark's House to get a Time Hourglass.
Go to Sage's Cave. Do the "Combat Basics" and "Magic Training" missions. This unlocks a bunch of optional ones.
After doing the two required lessons, you have two objectives: Reach Level 7, and water the seed daily until it's fully grown. (You can miss days and won't be penalized - it's just you have to advance a day after each watering.)
Once allowed entry, go to Sage's Cave. Proceed through the dungeon. In the looping crossroads area, keep walking until there's a scene, then follow Marinet on the way back.
Side Events
Karlo will be back in the Port Fina bar at night, giving a report on his visit to Finstaria if you go talk to him. Right at the start of the chapter, you can ask Karlo about Marinet's whereabouts (after the above conversation). And then you can talk to Karlo once more to get clarification about the Firefly Flower.
Before you earn the right to enter Sage's Cave, you can have a few conversations with Ellevark outside the Faraway Continent house.
You can keep trying to enter Sage's Cave before meeting the requirements, for some scenes where Pia... doesn't succeed at doing that.
When Pia first returns to Port Fina from the continent, there'll be a scene about her finding that the passage is now connected to her room.
Missions
Combat Basics
Required to progress. A lesson on combat, sort of. Very simple; beating the slime isn't actually even necessary.
Magic Training
Required to progress. A lesson on magic. Just beat some immobile scarecrows with Water Ball.
Weapon Types & Features
Just an explanation with a choice of weapon reward at the end.
Ten, Count 'Em, Ten Elements
Just an explanation.
Doing Dungeons
A short dungeon full of traps, with bonus rewards.
Claim Ticket A is in a chest that appears when you pull the lever up to the left from the start. It gets you 3 Red Potions.
Claim Ticket B is in a chest that appears after pressing a switch toward the upper-left (go left before the area with the super-deadly trap). It gets you 500 Rill.
Know About the BP Gauge?
An explanation, followed by a battle where you just have to get hit until you reach 200 BP. (You can actually fail it... if you're trying.)
Shop Upgrade! (Types)
Get 2,000 RIll and select the (R) mission to get your shop upgraded to have five slots for items.
Shop Upgrade! (Capacity)
Get 10 Tree Branches and 5 Tough Rocks. They're both pretty easy to find in Belk Plains or Port Coast. Once turned in, you can stock a total of 40 items in your shop.
Chapter 3
Main Plot
Complete the required "Train Your Alchemy" mission. Sell all of the Training Potions. Report to Ellevark about having sold the potions.
Go to Central Plaza and talk to the merchant in the bottom-left to get a map to the Forest of Death.
Go left from Windy Highway and left from Windy Crossroads. To break the rock in Windy Crossroads, you need a Milky Bomb. This can be alchemized using a recipe purchasable from Port Fina's library.
Use the Forest of Death Map on Romack Woods and beat the dungeon. Afterward, return home.
Create 3 Gelling Agents and report to Karnel when done. The recipe can be bought from the bottom-left merchant in Central Plaza for 150 Rill. (Or actually, they'll give it to you for free if you don't have that much.)
Remember that there are two recipes you can use. Slimy Fluid and Insect Fluid are dropped by slimes and bug monsters, respectively.
Go to Valgido's Domain in Rand Mountains using the map and beat the dungeon.
Side Events
If you never returned to Port Fina in Chapter 2 (possible by getting to Level 7 during Chapter 1), Ellevark will tell Pia to go back there after arriving in Finstaria to trigger the "giant hole in my new house" scene.
Missions
Train Your Alchemy
Required to progress. Simply go to the Alchemy menu and make 20 Training Potions from the 80 Training Berries, sleeping to recover MP when necessary.
About the Element Graph
Just an explanation.
Wanna Carry More!
You can get Soap by checking marketplace stalls until it shows up.
The Fluffy Brush is made via the Forge menu and requires a Fine Cedar Staff and 30 Rat Hairs.
You can buy or forge up to a Cedar Staff, then forge a Fine Cedar Staff by adding Coral from Port Coast. Rat Hair is dropped by Squeakarts (first appearing in Erance Mine, meaning you can't complete this until Chapter 4) and other mouse enemies.
Chapter 4
Main Plot
Talk to Ellevark in Erance Central Plaza to begin searching for the Scarlotus Luna. Come back to Central Plaza to meet Fenny again, again.
Talk to Karnel at home to learn about the rumor that's going around. Go ask people around town about the rumor. Specifically, you can ask Fenny, Popull at the Sweets Shop, a lady in Central Plaza, or the poet at the harbor.
Once you've done the Dark Emperor Karnel mission, Pia is at least Level 14, and you've asked a few people about the rumor, you'll bump into someone in Central Plaza.
Go to the Armor Shop and you'll encounter the girl again, this time going after her. (You'll need to have heard Fenny's story for this to trigger, for some reason.) Go down the alleys and fight the ruffians.
Leave the jail. Watch the guards' patterns and sneak around them. They're completely blind to anything not in a direct line in front of them, but they can see about the length of the screen.
From the first area, head up to area two, then left to area three, then work your way around. Eventually, you'll find a chest with your items, which allows you to simply fight the guards.
Back in the second area, go up to the door you couldn't reach before due to the guard on watch next to it. Go down the hall and fight the guards for their uniforms. Continue ahead. Search the room, then talk to Erena when she calls you over. Then leave and continue down the hall.
Go down the grate into the Castle Sewers and beat the dungeon.
Go to Central Plaza. Return home, then go south from South Highway to Erance Fortress. Whether you lose to Crowa or beat him makes no real difference.
Side Events
You can talk to Karnel outside the house in Erance about a few things.
In Giant's Claw, north of Erance Capital, there's a guy who wants wood to build a bridge. He'll buy any "wood" items for 120% of their base price.
Specific items contribute more or less to the wood total than others. Tree Branches are worst, followed by Black Charcoal, then Large Logs. Better than average are Construction Wood and Lunarbor Branches (the best). In the middle of those two categories is any other wood item.
The bridge will be built by Chapter 6 as long as you provided the materials. (But you can provide the materials anytime; it isn't limited to Chapter 4.) It leads to the Perplexing Waterside, and Erance Ruins past that.
Fenny sings in the bar at night, and when she does, there's a chest with the Fenny's Song music sheet.
If you ransack enough food (12 items) from the provisions storage in the barracks, Erena expresses her speechlessness.
Missions
Shop Upgrade 2! (Types)
Must have done the first type upgrade. Pay 8,000 RIll to get another item slot.
Shop Upgrade 2! (Capacity)
Must have done the first capacity upgrade. Get 10 Tough Rocks, 5 Hefty Rocks, 5 Copper Lumps, and 1 Silver Ore.
Tough Rocks and Hefty Rocks can be found in caves and mountains.
Copper Ore and Silver Ore can be mined (using Mattocks in Erance Mine), and Copper Ore can be alchemized into Copper Lumps with a recipe from Erance's bookstore.
Combine to Power Up Equips!
Just an explanation.
Pesky Status Ailments
Just an explanation.
A New Ally! / Battle Dark Emperor Karnel
The first mission is an intro, and the latter is a fight with Karnel. (The game recommends long-range attacks to get an advantage, due to his focus on close-range ones.)
When you beat him, you earn the right to either use him as a party member or have him run the shop. You sort of also get Ellevark for both those things, but he's... not willing to be too helpful.
Training With Friends
Appears after beating Karnel. An explanation and a test to induce Balance Break - just keep attacking the Scarecrow as often as you can.
A True Battle with Ellevark
An extremely difficult battle with Ellevark that's available after beating Karnel. However, it's basically not feasible until you're near the end of Part 1. If you manage to beat him, you get a special ending.
Chapter 5
Main Plot
Walk south.
Meet Fenny in the plaza, and you'll get a new mission. Do the "Just A Question..." mission, the "Relentless Training" mission (which follows Just A Question), the "Erena's Identity" mission, and the "Shaman of Northyne" mission.
Go to Central Plaza for a scene discussing how to escape. Go to Cleri Road right of Northyne and inspect the odd structure. Return home for a discussion about the structure, beginning the escape effort. (This scene starts the 72-hour timer.)
There are several possible ways the 72-hour segment can play out, but they lead to the same thing. In truth, there are two goals going on: collecting MP for the pillar, and investigating the cause of the snowstorm.
Collecting all the MP is very difficult to do. If time runs out, there's no gameplay penalty - you essentially skip to the last part to go to the Ice Altar. So you can either see all the scenes, or just focus on getting MP for the extra rewards at the end of the chapter.
The following is for actually seeing all of the scenes as opposed to running out of time. (If you successfully power the pillar, it skips to the attendant scene.)
Go to the Plaza for a battle with some monsters. Talk to Erena in the plaza and she'll get an idea. Go to the fortune teller's to question the shaman.
When 36 hours or less remain, the shaman's attendant will visit the shop with important information. Talk to the kid in the plaza. Bring 3 Ice Blocks for the Altar Path Map. Afterward is a series of scenes which you'll see in some form even if you run out of time.
Go to the Altar Path in North Snowfield with the map and beat the dungeon.
Side Events
The only "side events" for Chapter 5 are basically just all the ways to aid in mana collection. But even taking every advantage, it's still quite difficult to supply all the MP; 100% isn't expected of you at all.
Bringing a Steel Lump to Ellevark at the pillar will let him fix a mechanism to recover 20 MP every hour. So if you do this right away, you'll be able to get a maximum of around 1,400 MP from that.
You can alchemize a Steel Lump from 2 Iron Ores and Black Charcoal. Iron Ore can be found in North Snowfield or mined from the gem rock in Cleri Road. Black Charcoal can be found in North Snowfield. For it to be useful at all, you should probably make it in advance.
There's a shiny thing in the general store (only after starting the countdown) which takes 8 hours to get. It's a Dim Glow Rock, which is worth 2,400 MP.
The most optimal use of items, however, is farming for 5 Power Crystones from Northyne marketplace stalls before starting. This is the biggest MP advantage you can give yourself by far, though yeah, it's kind of lame.
Forcing Ellevark to supply MP when he has 0 will have him give an extra 500. Asking him again will make him give 1. Asking him after that will make him take 500 MP (though you can put it back afterward). These "steps" can only be done once - they're not reset by anything.
With optimal use of advantages:
40,000 (Total) - 1,400 (Auto-Recovery) - 15,000 (Power Crystone x5) - 501 (Ellevark) = 23,099 MP to go.
If you start the sequence with maxed MP, you should be able to get at least 6 "rounds" of MP out of your party by sleeping 12 hours to recover. It helps to use "to tomorrow morning" instead whenever it's less than 12 hours (so 8 PM or later).
23,099 MP / 6 rounds / 4 members comes to a required average of about 962 MP per member - if you manage 7 rounds, it's 824. You can stretch it further by using items to recover MP on top of just sleeping (i.e. a ton of Yellow Potions), though this isn't unlimited due to Cost.
An additional option for getting extra rounds is running the shop (ideally with an overpriced item no one will buy), as you recover 1/12 of your MP and Cost each hour. If you time your shop hours and rests smartly (i.e. run shop until 7 AM, then sleep until morning to spend just 1 hour), you can squeeze out some extra rounds.
Lastly, here's the full list of items to exchange for MP, or at least ones that don't have the default value of 300. A number of these are not actually obtainable by this point. Again, the best you can get is Power Crystones from Northyne stalls.
| 15,000 | |
| Power Crystone | 3,000 |
| 3,000 | |
| 2,700 | |
| Dim Glow Rock | 2,400 |
| 2,400 | |
| Dark Crystal | 1,800 |
| 1,800 | |
| Star Sand | 1,500 |
| Eidolon Horn | 1,050 |
| Libys Stone | 900 |
| Aelstone | 900 |
| Milloz Stone | 900 |
| Orichalcum | 900 |
| 600 | |
| Melpa Wind | 600 |
| Spirit Rock | 450 |
| Soul Rock | 360 |
| 360 | |
| Magic Paper | 360 |
| ("Mana-Filled" Item) | 300 |
| Mana Shard | 240 |
| Sylpheed Glass | 240 |
| Blaze Rock | 180 |
| Magic Holy Water | 150 |
| Wind Glass | 120 |
Special rewards at the end of the chapter:
Over 10% of the MP (4,000): Green Fruit, Yellow Fruit
Over 30% (12,000): Critical Drink, Block Drink
Over 60% (24,000): Rainbow Fruit
Over 90% (36,000): Comeback Potion (Revive Potion with 3000 HP recovery)
100% (40,000): Diamond Stone (adds +8% non-elemental resistance)
Missions
Just A Question... / Relentless Training
Required to move the plot forward. The first is an explanation of Hyper Specials. The latter is a brief dungeon you have to beat with Karnel and Mimi.
Claim Ticket A is in the middle of three chests to the left after the start, and gets you two Milky Bombs.
Claim Ticket B is in the bottom-right and gets you a Revive Potion.
Claim Ticket C is south of the goal and gets you a Topaz Stone.
Fight With Erena
A fight with Erena for the rights to use her. She's majorly weak to ice, so try to use ice spells.
If you attempt it during Chapter 5, Ellevark recommends skipping it if it seems too tough, implying that it's closer to Chapter 6 difficulty and can be left until then.
Erena's Identity
A short scene. You're required to watch it eventually, as it's one of the necessary flags for the discussion about the Magic Pillar.
Shaman of Northyne
A required scene to move the plot forward. It appears after meeting Fenny in Northyne.
Let's Decide Duties / The Cooking Duty Saga
An optional series of scenes. You only get a reward from Karnel's (some special healing items), but they're entertaining.
Chapter 6
Main Plot
Go to the castle gate to... be denied entry, then take another way inside.
Proceed along until you have to fight a guard. Head up the hallway on the right to listen in on a meeting. Head left and enter the room to find stairs leading to the top of the castle.
Go to the Faraway Continent cabin and talk to Erena. Go to Erance Central Plaza for a scene.
Go to the Slums, east of Erance from the map. Give the thirsty orphan a drink to be told about the well. Go in the well.
Thieves' Hideout Directions
Head south two screens. Down the middle path is a thief who will give you the Club Key.
Head up a screen and head right to a club door; go through it. In the stone hallway, go up the narrow path to a room of chickens. "Talking" to the chickens will make them move away; reach the chest for the Diamond Key.
Back in the stone hallway, go up the way you came, then up another screen. Cross the bridge to the right and open the diamond door. Beat the thieves for the Heart Key.
Leave the room, go right, and open the series of doors leading to the boss. (Optionally, there are also various treasures and a Spade Key to find.)
Side Events
Failing the "5 seconds" scene in various ways gets you different dialogue after the "game over." The different ways to fail are slipping on a banana peel, opening the chest, going the wrong way, or just running out of time without doing any of those.
Fenny will be back in Erance, and can tell you a story. Be sure to listen to it if you want to see future Fenny scenes.
As Mimi in the castle, south of the path to the top is a storeroom with a guard trying to fend off rats. Help him for a Deluxe Montblanc.
Mimi and Karnel have some conversations on the Faraway Continent. (Mimi is outside the cabin, and Karnel is at the Old Ruins.)
No real importance, but there are a number of "drinks" you can't give the thirsty orphan.
Awful: Shining Shard, Insect Fluid, Slimy Fluid, Spring Essence, Yuva Oil, Crimson Dye, Indigo Dye
Wild: Dragon Blood, Turtle Essence
Illegal: Any kind of beer.
Missions
I Want To Help!
A scene that officially adds Mimi to the party without a fight, since you essentially already fought her.
New Ways To Assist
Appears after both Erena and Mimi have officially joined. After a heated discussion, it adds new Ally Orders for alchemy, forging, and harvesting materials.
Shop Upgrade 3! (Types)
Must have done type upgrade 2. Pay 30,000 Rill for another shelf.
Shop Upgrade 3! (Capacity)
Must have done capacity upgrade 2. Get a Moving Gear, Libys Stone, Aelstone, Milloz Stone, and Orichalcum.
Moving Gears can be found in Erance Ruins. All the others can be found in Erance Mine or mined from rocks.
Pesky Ailments: Advanced
Must have completed the original Pesky Status Ailments. A tutorial on the elemental aspect of status ailments.
Use an ailment-inducing spell, then an attack spell of the opposing element - this will allow spells of that element to do "extra damage" to the scarecrow despite its perfect resistance.
Battle Coaching
Just a scene about the party training that gives everyone EXP.
Take Some Medicine
A scene that offers a choice of several recovery items.
Karnel's Torn Clothes
Make Cloth by alchemizing Moolmorm Thread or Torn Rags. The secret reward is Karnel's Hyper Special.
To A Special Dungeon!
A bonus dungeon with a tough boss. Your rewards are a Dragon Scale, a Dragon Claw, and recipes for Dragon Helm and Dragon Boots. You also get the Dragon's Step Map (for Finstaria Grasslands) to revisit the dungeon, though the boss is gone.
Chapter 7
Main Plot
Talk to Ellevark outside the shop in Erance to open the Past Archive. Talk to Mimi on the Faraway Continent.
Beat the Sage's Cave.
Go outside the cabin. Go to Erance Castle.
Side Events
Another Side scenes "Erena's Past" and "The First Beginning" are available in the Past Archive.
Talk to Erena in the Faraway Continent cabin at the start of the chapter (before going with Mimi) for a scene.
With Marinet in the active party, you can go through that hole on Cleri Road in Northyne, which leads to the optional North Temple dungeon.
If you heard Fenny's story in Chapter 6, you can talk to her in Chapter 7 or 8 about going to Erance Castle. If you don't pick "let's go in together," you'll miss out on a conversation and reward in Chapter 9.
Ellevark has some conversations after showing you the Past Archive. Erena has some conversations after the optional sweets shop scene. Mimi has some conversations in the last part of the chapter (after summoning the dragon).
Missions
While I Can...
A battle with Marinet to have her officially join. Note that you can Mute her to basically take away all her attacks.
Selling Rare Items!
A three-part tutorial on how rare items work in the shop. (Spoiler: The hidden market price for the Fake Marinet Doll is 180 Rill, so you can base your price around that.)
Got Some Great Items!
Must have completed "Weapon Types & Features," "Ten, Count 'Em, Ten Elements," and "Combine to Power Up Equipment." Bring two Spirit Grasses for the rewards.
As Ellevark says, the only place to get Spirit Grass (at least as of Chapter 7) is from Undines at the North Temple in Northyne (see Side Events).
Change Your Element Graph?
Must have completed the About the Element Graph mission. A chance to change Pia's Element Graph with a whole bunch of explanation. You can only change it once, but can back out and leave the mission there for later.
More Storage!
Must have completed "Wanna Carry More!" for the first expansion. Make Construction Wood x2 to expand equipment storage to 400 and carrying capacity to 150.
The recipe for Construction Wood is 3 Large Logs and 1 Toad Oil, or 6 Tree Branches and 1 Toad Oil.
Tree Branches can be found in most foresty areas. Large Logs can be found in North Snowfield and Sacrificial Altar. Toad Oil is dropped by Quietoads in the North Temple (see Side Events).
Chapter 8
Main Plot
Go to Windy Highway from Finstaria and talk to the soldier by the east gate. Go to Armonica Highway.
Use the Master's House Map on Halfbeast Forest and beat the Jungle Path. Go to the Sun God's House.
Head east from Gran's house and go to Natius Ruins. Talk to Gran, and bring the five types of ingredients he wants from the area.
Go to Natius Ruins and proceed to the end of the actual ruins.
Go to the home in Finstaria. Go to Erance, and go outside the house. Go to Erance Central Plaza for a boss fight.
Side Events
"Research in the Castle" is available in the Past Archive.
The Fruit Garden on Armonica Highway depends on your good faith. It can't stay open if the items you take and the amount you pay don't balance out.
Each item you take "costs" the garden, and paying makes up for 10 items' worth. If the garden goes over 40 items "in debt," it closes for 300 hours (12 and a half days).
(Note that even if the garden is "empty" after picking everything, it still asks you to pay the fee when you enter, so you can spend extra if you want to ensure it stays open.)
Southeast of Gran's house is Frixis and Fraxinus's house, though there's not much to do with them but have a few conversations.
There are different contributions of "quality" for each item you provide for the stew. The results depend on the sum quality of the ingredients. (Note that rewards are not cumulative; S Rank only gets you the S Rank item, none of the others.)
Fire
| Tree Branch | +1 |
| Large Log | +2 |
| Black Charcoal | +3 |
Liquid
| Insect Fluid | -4 |
| Spring Essence | +1 |
| Sweet Extract | +1 |
| Milk | +2 |
| Forest Springwater | +4 |
| Forest Dew | +6 |
Mushroom
| Pseudosol Shroom | +1 |
| Cave Shroom | +2 |
| Dark Shroom | +4 |
| Parasol Shroom | +5 |
| Dangerous Shroom | +7 |
Vegetable
| Perplex Fruit | +1 |
| Glowing Moss | +1 |
| Full Moon Flower | +2 |
| [Any Color] Fruit | +2 |
| Wild Strawberry | +2 |
| Yellow Herb | +3 |
| Hot Fruit | +3 |
| Spirit Grass | +5 |
| Lively Seed | +7 |
Main
| Rotten Meat | +1 |
| Small Fish | +2 |
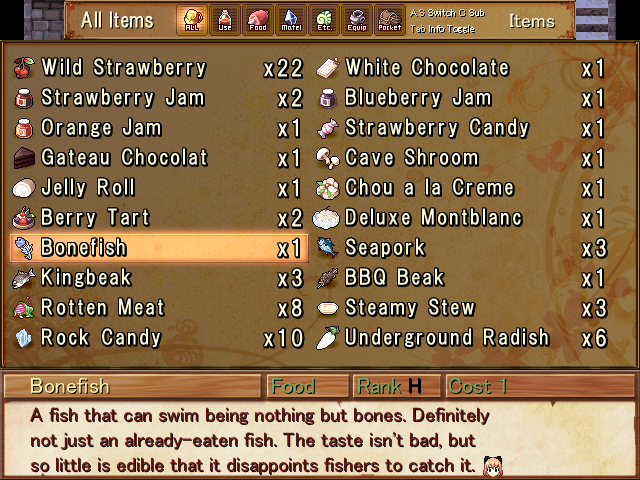
| Bonefish | +3 |
| Seapork | +4 |
| Beast Meat | +5 |
Ranks
E Rank: 0-7
D Rank: 7-10
C Rank: 11-14 (Green Fruit, Yellow Fruit)
B Rank: 15-17 (White Fruit, Black Fruit)
A Rank: 18-23 (Rainbow Fruit)
S Rank: 24+ (Comeback Potion)
Missions
Make the Ultimate Medicine
Appears after clearing "Training With Friends," "Pesky Ailments: Advanced," and "To A Special Dungeon!" Gives you the Rainbow Potion recipe and a Rainbow Fruit to help make one.
So, We're Finally Here / The Final Mission!
Appears after clearing "Selling Rare Items!", "Got Some Great Items!", and "Battle Coaching." Create a Rainbow Potion and a ????? Recipe - as the board says, you just need to have made one of each.
You'll want to complete this mission before fighting the last boss of Chapter 8. Spoiler explanation for why: You don't get a reward immediately, but if you complete the mission before fighting Necrovia and getting locked into Chapter 9, Ellevark will give you his Eternity Staff in a scene shortly before the final boss.
Final Mission Part 1: Making a Rainbow Potion
Recipe 1: Rainbow Fruit x2
Recipe 2: Rainbow Fruit x1, Fairy Tear x1
You get one free Rainbow Fruit from Make the Ultimate Medicine. Other places where you're rewarded 'free" Rainbow Fruits are the tree in Chapter 2, the 60%+ MP reward in Chapter 5, and the A Rank (but not S Rank) reward for the Chapter 8 stew. There are also two blue chests that contain them: one in Valgido's Domain, one near the end of Sage's Path.
The best "endless" source for Rainbow Fruits is probably buying them from stalls in Erance. Also, the dealer in the Thieves' Hideout will sometimes sell a Rainbow Fruit two-set for 20,000 Rill (or a Rainbow Potion two-set, incidentally - but for the mission, you have to make it yourself!).
Fairy Tears don't seem obtainable in Part 1 at all. You'd need either Better Netter Traps to use in Erance (which seem to be Part 2 only), access to a monster only in Part 2, or a random box item from much later.
Final Mission Part 2: Making ????? Recipe (Kutune Shirka)
Recipe: Blue Falchion, Scarletite Bug x4, Melpa Wind x2, Sand Gem x3, Gold Ore x3
For the Blue Falchion, see Part 2b below. Scarletite Bugs can be found in the Distant Wastes. Melpa Wind can be gotten from Melpas in the Distant Wastes. Sand Gems can be found in the Distant Wastes (and are also dropped by the Sandmen there). Gold Ore can be mined from Cleri Road or Halfbeast Forest, or found in Erance Ruins, North Snowfield, or North Temple.
Final Mission Part 2b: Getting a Blue Falchion
You can buy the Blue Falchion Recipe from Gyros: Falchion, Frozenite x5, Perplex Fruit x2.
For the Falchion, get the Falchion Recipe from Halfbeast Forest. It's a Saber and a Silver Lump; you can buy a Saber from Gyros, then get a Silver Lump by alchemizing some Silver Ore.
Frozenites are most easily found in the North Temple, but also appear in North Snowfield, Sacrificial Altar, and can be mined on Cleri Road. Perplex Fruits are found in Halfbeast Forest and Jungle Path.
Chapter 9
Main Plot
Proceed toward the upper-left.
Proceed through the Sage's Path. (After the scenes following the first segment of the cave, you're able to warp out and warp back to where you were later.)
When the same room seems to loop, keep going forward. You can either beat Remi (defense-ignoring damage via Venom/Burn status effects is useful) or wait out the ten minutes. As you'll notice, she only does damage by reflecting your attacks.
Go through the second part of the Sage's Path.
After a bunch of scenes, one last part of Sage's Path.
Once the party reunites, you're at the point of no return. After doing everything you want to do, proceed to the Final Chapter and the final boss.
After the final boss: The exit to the maze is toward the bottom-left. And don't worry: if you run out of time, it just restarts you at the start of the maze.
Side Events
If you saw the Chapter 7/8 scene with her, you can talk with Fenny in Erance one last time to say goodbye and get a Spirit Ornament as a farewell gift.
"In the Stone, And Yet" is added to the Past Archive once you get to the point of no return.
Part Two
Chapter 1
(Note: You can skip directly to Part 2 by choosing New Game, then holding down both the Cancel Button and Sub-Key (keyboard defaults: X and C) as the screen fades until the "secret code" message pops up. You'll start with minimal stats and items. Obviously, this is not recommended in most cases.)
Main Plot
Visit Rune Hill. Go to the bar and talk to the barkeep. Go to Central Plaza to bump into Fenny. Visit Central Plaza again to properly meet Fenny.
After meeting Fenny, return to Ellevark's House. Return to the bar after meeting both Fenny and the barkeep and talk to Karlo.
After doing all of the above, return to Ellevark's House. Go to the bar to ask Karlo for help.
It's not necessary right away, but at least 48 hours after first visiting Rune Hill, and after you've begun the search for the Port Fever Cure ingredients, you can go there again to rent the shop.
Use the Tower Ruins map from Ellevark's House on Belk Plains and proceed east. Get an Iris Herb from Lux Plains; it can randomly appear there, and is also a guaranteed chest after beating the boss. Go to the harbor and take the ship to Prela Cape. The Serpent Gastrolith is in a fixed chest after beating the boss.
Once you have both ingredients, return to the bar and Karlo will be back, as long as it's been 24 hours since he left. Go home and make the Port Fever Cure.
Side Events
"Inheriting Her Duty" is available in the Past Archive. Viewing it grants access to a laboratory behind a bookshelf in Ellevark's House, where there are some recipes and a magic chest (not openable until quite a bit later).
You can go up the Tower Ruins for a variety of good stuff. Most notably, at the top is a book that allows you to upgrade equipment by combining two of the same, and a warp circle that unlocks an extra island on the Distant Isles.
The old man in the Wheat Fields will ask for help popularizing his wheat. Harvest his Crop Wheat and talk to the old lady inside for a Quality Flour recipe. If you sell Quality Flour x10 at the Port Fina shop, it'll become popular enough to get stocked in the general store, and you can get a Payday Peony as a reward from the old man.
Chapter 2
Main Plot
Talk to Karlo in the bar. Go to Finstaria.
Go to the Central Plaza to meet Fenny. Talk to the mechant in the plaza.
Go to Finstaria Grasslands and proceed until you encounter a special map with a cabin. Go in and talk to the old man. Take the stairs out.
Head west to Finstaria Grasslands EX and proceed until you find the cabin. Talk to the other old man.
Return home. Go to Erance and talk to the guard at the castle. Go to Karnel's House in Erance.
Go to Finstaria Plaza. Go through Outskirts Forest on the world map, then to Outskirts House.
Proceed through the Warped Path.
Go to the Royal Research Labs in Erance.
Go to the Steep Mountains in Rand Mountains and beat Valgido.
Side Events
You can have some conversations with Gran using the Projection Mirror during Chapter 2.
Since you still have access to Sun God's House, you can visit as of Chapter 2 and talk to everyone there.
If you bring Crop Wheat to the barkeep in Port Fina, he'll ask you to make some new drinks. Do so, then come back in three days, and he'll then ask you to bring him drinks from around the world. The reward is always just money, 120% the base price of the drinks you give him.
The first are drinks from Finstaria, whose recipes you can get from the merchant in the plaza: Lize Red Wine, Lize White Wine, and Lize Brandy.
Missions
A Mystery Recipe...?
Self-explanatory... literally. Okay, but really.
Get a Seaboy from Port Coast or Port Fina stalls. Get a Megaton Hammer by buying the recipe from Port Fina's library and forging it up from a Middle Rod (which you can buy at Port Fina's weapons shop). Then... "forge."
Remodeling My Home
Make a Wind Bell from Sylpheed Glass and Silver Lumps to add a shortcut to town at the Port Fina shop, so that it matches the other ones.
Chapter 3
Main Plot
Go to Central Plaza. Revisit Central Plaza. Go to the Armor Shop to... not find anything. Go to Central Plaza again.
Use the Polluted Sewers Map on the sewers and go through them.
Proceed through the castle. You can try to avoid raising suspicion for later rewards (see Side Events), but will get found out eventually.
Proceed through the Barracks to the Court Ward. Head west. When you duck into a room to hide, check the bookcase. Leave the room. Enter the nearby door.
Proceed ahead, and fight Silmina. (Note that if you die, you can choose to rewind to before you entered the castle.)
Go to Central Plaza and talk to Erena.
Side Events
You can have some conversations with Gran... and Frixis, using the Projection Mirror during Chapter 3.
At the sweets shop, after starting the wheat quest, Popull will ask for Quality Flour x10 to make EX sweets. Give it to her and come back in 3 days, and she'll add them to the menu, as well as their recipes, and give you a free Tiramisu EX.
After doing Finstaria's, you can get recipes for the Drinks of the World sidequest from the bar in Erance.
A miner in Erance Plaza gives you the Gem Mine map. The polisher who you occasionally find in the Gem Mine gives you a random polished gem if you provide four Gem Ores. Have him do this five times, and he'll give you the Forbidden Mine map.
Castle Suspicion Events
Besides slight variations on the scene at the end, Karnel will give you different rewards at the start of Chapter 4 depending on how you do here.
Lady Soldier (Court Ward 04)
Forced conversation; you'll be called to if you don't talk to her directly.
| The same to you | Suspicion +0 (+1 if you take too long to reply) |
| Thank you very much | Suspicion +0 (+1 if you take too long to reply) |
| ... | Suspicion +2 |
| Thank you, how about a spot of tea later? | Suspicion +1, Flirtiness +1 |
| Cancel | Suspicion +1 |
Curious Noble Girl (Court Ward 04)
Can be safely ignored.
| It ain't that weird, right? | Suspicion +2, learn "Ricotta" |
| It's vintage, you see | Suspicion +1, talk again to learn "Ricotta" |
| Just worn it a little too long | Suspicion +3 |
| You're simply too beautiful, my dear | Suspicion +0, Flirtiness +1, talk again to learn "Ricotta" |
| ... | Suspicion +1 |
| Cancel | Suspicion +2 |
Average Noble (Court Ward 03)
Simply talking to her directly will raise no suspicion.
But if you don't talk to her, she'll stop you as you leave.
| Dunno | Suspicion +4 |
| Miss Ricola, yes? I'm familiar with you | Suspicion +4 |
| Miss Ricotta, yes? I'm familiar with you | Suspicion +0 (if you learned her name from Noble Girl) |
| ... | Suspicion +5 |
| I'm not familiar, tell me more about yourself | Suspicion +4, Flirtiness +1 |
| Cancel | Suspicion +4 |
Tea-Loving Nobleman (Court Ward 03)
Can be safely ignored.
| Oh, indeed | Suspicion +3 for all sub-choices, but +2 for Cancel |
| I kind of have no idea what you're saying | Suspicion +0 |
| Hey, about about some peperoncino instead? | Suspicion +1 |
| Cancel | Suspicion +2 |
Maid (Residences 02)
Talk to her to tighten up Ellevark's sash and get Suspicion -1.
Lost Noble (Court Ward 02)
Forced conversation; you'll be called to if you don't talk to her directly.
| It's the 22302nd room | Suspicion +3 |
| It's the 2nd room on floor 223 | Suspicion +4 |
| It's in building 22, on floor 3, the 2nd room | Suspicion +4 |
| I shall lead you there | Suspicion +3, Flirtiness +1 |
| A servant shall lead you there | Suspicion +2 |
| Cancel | Suspicion +0 |
Soldier Being Attacked (Court Ward 02)
Can be safely ignored, but it triggers once you walk a few steps into the side-room he's in.
| Okay, leave it to me! | Battle, BBQ Turkey, Suspicion +2 |
| I am a noble, so I shall do nothing so uncouth | Suspicion +0 |
| Hey, you're the soldier, do somethin'! | Battle, Suspicion +2 |
| Cancel | Battle, BBQ Turkey, Suspicion +2 |
Suspicion Ranks
3+ Flirtiness (Vitality Seed x5)
0-3 Suspicion (Berserk Stone, Wizard Stone, Revive Potion)
4-6 Suspicion (Power Stone, Magic Stone, Revive Potion)
7-10 Suspicion (Revive Potion)
11+ Suspicion (White Potion)
Missions
Let Me Take Charge! / Marinet! A Test!
Beat a special dungeon to unlock Marinet as a controllable character.
These dungeons aren't so much about combat as figuring out how to utilize the character's different skills - be sure to look at (and set) them all.
Use Lightning or Thunderstorm to destroy the distant crystals.
Keep your distance from the monster and use thunder spells to defeat it. Destroy the crystal near it.
When you find a switch, prepare Spark Wave and cast it immediately after stepping on the switch to defeat the enemies that appear around you.
Dodge the bouncing balls and use Spear Bolt to reach the especially far away crystal.
Proceed through the slimes with caution; you probably want to use Spark Wave, but watch your BP.
For the three monsters at the end, Spear Bolt is probably the safest option.
Can I Be Leader Too?
Appears after beating "Marinet! A Test!" A special dungeon that unlocks Karnel as controllable.
In this one, there's nothing that even damages you, so the time limit is the only danger.
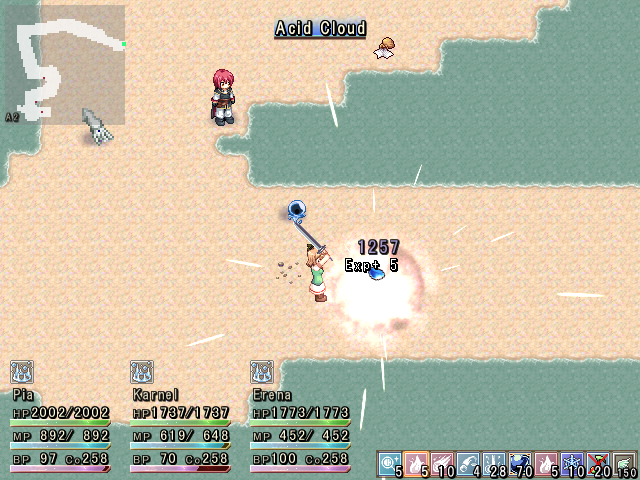
Head right at the start and destroy the crystal with Acid Cloud.
Go around, then down to the scarecrows. Use Petranave to petrify them, then shatter them with an attack and break the crystal.
Head up to the gold cocoons. (The chests past the left one contain Claim Ticket A (for an Item Searcher) and Iron Ore.)
King Morm Cocoons have 30,000 HP. To destroy them as quickly as you can, use Venom Bottle to cause Venom, then Acid Cloud to lower their defense, then keep using normal attacks. Petrify doesn't really help. Once they hit Balance Break, use Break Burst.
The red crystal is immune to all status ailments and the elements available... so just approach from the lower-right and hit it with diagonal attacks across the water.
The blue chest behind the Mega-Def Scarecrow contains a Black Stone.
VIP in the Shop!
Make Fresh Salad and Brilliant Potage for a boost in shop visitors for several days.
Fresh Salad: Ripe Popplo, Shamia Grass x2, Neptune Grass x2, Brilliant Corn.
Ripe Popplos are easy to find in Lux Plains.
Shamia Grass is in Belk Plains and Port Coast, and respawns on Windy Highway.
Neptune Grass can be fished up from most places.
Brilliant Corn can be bought from Finstaria's general store or found on the Outskirts Path.
Brilliant Potage: Brilliant Corn x2, Milk, Butter, Goldfish.
See above for Brilliant Corn.
Milk can be bought from Port Fina's general store or marketplaces anywhere.
Butter can be alchemized from Milk or sometimes found in stalls.
Goldfish can be fished up with Better Netter Traps.
Chapter 4
Main Plot
Leave Northyne and use the Altar Path Map on North Snowfield. Climb to the top of the mountain. Return to town and visit the fortune teller.
This begins a 72-hour timed sequence. You can do many different things during this sequence, but the story will proceed no matter what once you run out of time.
Completing the sequence "successfully" for the rewards means going with either Karnel or Mimi's final plans (which take up all your remaining time). The steps for each are listed below. All time-spending options are accompanied by bonuses, so it's worth doing as much as you have time for.
Unlocking Karnel's Plan
One requirement is to learn about the Shaman File. Talk to the shopkeep at the armor shop to learn about Maya's diary. Search Maya's belongings with Mimi. Ask at the armor shop again, then ask at the bookstore to obtain the diary. (If night falls, the shops close, so skip ahead to non-diary steps until day to use your time optimally.)
Ask Karnel to decode the diary, and decode all four of the "after Maya left the village" pages to learn what the Shaman File is, and that she has it.
Talk to the snowman kid in the plaza to be directed to his grandpa in the Whitelands. When you talk to the old carver, he'll ask for proof that Maya is still alive.
You can either investigate the altar with Karnel twice to find a summoning circle, or seek the dragon with Marinet 4 times to find Maya's Ring (much more time-consuming). After presenting the carver your evidence, ask him all the questions (though the research one is technically optional), and he'll tell you about the Crystal Cave.
Report to Karnel about what you learned from the carver, and he'll realize Maya's aims and propose a final plan to find her. Choose it once you're ready to end the sequence.
Unlocking Mimi's Plan
Ask around the harbor once with Marinet. Question Mimi once for a scene helping her remember Maya.
Search Maya's belongings with Mimi. Question Mimi again for a flashback.
Ask Dagon to recount the last time she saw Maya. Question Mimi again for a second flashback.
Talk to Karnel and choose to investigate the altar. Check around the left side of the altar to find a magic circle. After returning, investigate the altar a second time; at the end, choose not to erase the circle.
Investigate the altar a third time to use the password learned from Mimi's flashback. Then choose it one more time to execute the magic circle plan. When you're ready, choose Mimi's last resort to end the sequence.
Side Events
You can have some conversations with Gran using the Projection Mirror during Chapter 4.
At the start of the chapter, before the timed sequence begins, you can have some conversations with Karnel, Erena, Mimi, and Marinet. Karnel will also give you rewards for your Chapter 3 performance.
After doing Erance's, you can get a recipe for the Drinks of the World sidequest from the Attendant at the Northyne fortune teller.
Karnel's Plans (Home)
Investigate the Altar
Time: 7 hours
Bonus: Random medium/high-level Stone, Forge EXP for Ellevark and Erena
At the Ice Altar, check the weird spot along the left edge to find a magic circle. (You can also "manually" go to the Ice Altar, find it, and spend 6 hours to bring Karnel - in practice, that takes around 10 hours total.)
Go investigating a second time to locate the main magic circle. You're given the option to erase it, but doing so just prevents further investigation.
The third investigation reveals that part of it is specially encrypted.
After hearing the "Adonai Tzvaot" phrase from Mimi's second flashback, you can come and decrypt it.
Investigating again after that will lead you to Maya, and prompt Mimi to offer her last resort.
Rest
Time: 4 hours
Bonus: Fully recover HP/MP/Cost, get a Karnel Special Drink
Serves no particular purpose to the investigation.
Decode Diary
Time: 2 hours per page (12 total)
Bonus: Ellevark/Karnel gain Forge EXP (for each page decoded)
Appears once you get Maya's diary from the bookstore. There are three sets of four pages to decode which have various information, only some of which has practical use. Incidentally, re-reading decoded pages costs no time.
"Start" Page 3: Allows you to presume Maya drew the magic circle, but no real practical use.
"After" Page 1: Describes the last time Maya met Dagon, letting you ask her about it.
"After" Page 3: Describes the last time Maya met with Mimi, letting you ask her about it.
"After" Page 4: Confirms what the Shaman File is and that Maya found it.
Report On Investigation
Time: 4 hours
Bonus: Forge EXP for Ellevark and Karnel
Appears after talking with the old carver. If you heard about the Crystal Cave from the carver, know what the Shaman File is, and know that Maya has it, reporting to Karnel will lead to him suggesting his final plan.
Plan to Find Maya
Time: Remainder of time
Appears after reporting sufficient information to Karnel. Considered a "success."
Mimi's Plans (Home)
Question About Maya
Time: 4 hours
Bonus: Rill and Shop EXP for Ellevark and Mimi
The first time, Mimi remembers that Maya collected strange things and did experiments. Afterward, you need to possess certain info for Mimi to remember more.
One flashback triggers if you've checked Maya's belongings and asked around at the harbor at least once.
Another flashback triggers if you've seen the Dagon flashback. (It can also trigger after asking about the day Mimi met Maya. But asking that, and thus reading about it in the diary, is not actually necessary.)
Search Maya's Belongings
Time: 10 hours
Bonus: Random recipe, or random book if you already have recipe
Doesn't really give any info. If you've tried asking the old carver about Maya, you'll find a note... that doesn't tell you much.
Help Decipher Magic Circle
Time: 8 hours
Bonus: Level-relative EXP for whole party
Appears after encountering the specially-encoded magic circle on the third altar investigation. Does nothing and gives no info.
Ask About Maya's Diary
Time: 3 hours
Bonus: Rill and Shop EXP for Ellevark and Mimi
Appears after learning about Maya's diary. Gives no info.
Ask About Maya's Ring
Time: 3 hours
Bonus: Rill and Shop EXP for Ellevark and Mimi
Appears after you find Maya's ring. Gives confirmation that the ring belongs to Maya. Also, Mimi learns the Summon Chillfire skill. (But if you don't learn it here, she'll just get it at the start of Chapter 5.)
Ask About Day She Met Maya
Time: 4 hours
Bonus: Rill and Shop EXP for Ellevark and Mimi
Appears after reading about this in Maya's diary. If you asked Dagon about her last meeting with Maya, Mimi's able to remember. This flashback gives you the information needed to decipher the magic circle. However, it's more time-consuming to unlock this specific question than is it to see it via "Question About Maya."
Mimi's Last Resort
Time: Remainder of time
Appears after making use of the magic circle in the "investigate the altar" route. Considered a "success."
Erena's Plans (Plaza)
Leave Village and Explore / Search For Crystal Cave
Time: 7 hours
Takes you to Silver Snowfield. There's nothing for the investigation there. (You can also go there via North Snowfield on the world map.)
Explore Dungeon
Time: 7 hours
Appears after one trip to Silver Snowfield. Takes you to Suspicious Temple. There's nothing for the investigation there. (You can also go there via North Temple on the world map.)
Marinet's Plans (Harbor)
Seek the Dragon
Time: 11 hours
Bonus: Random EX cake
The first three times, you just get some items. The fourth time, you find Maya's Ring. After that, you can revisit that area for a few more mana-filled items.
Ask Around Harbor
Time: 5 hours
Bonus: 4 random fishable items (Better Netter Trap level)
The first time, you learn that Maya seemingly never took a ship off the continent (which allows Mimi to have her first flashback). The second time, you confirm this.
Actions With Villagers
Ask Snowman Kid (Plaza)
Time: 4 hours
Bonus: Random consumable item
He directs you to his grandpa. This allows you to talk with the carver in the Whitelands.
Ask Shopkeep (Armor Shop)
Time: 4 hours
Bonus: Random consumable item
He'll tell you about Maya's diary. If you ask again after checking the cabin and not finding it, he'll tell you Mimi's mother had it.
Ask Shopkeep (General Store)
Time: 4 hours
Bonus: Random consumable item
Gives no info.
Ask Shopkeep (Bookstore)
Time: 4 hours
Bonus: Random consumable item
After hearing about Maya's diary from the armor shop, he'll give it to you.
Ask Dagon (Fortune Teller)
Time: 4 hours (about Maya), 2 hours (about Shaman File)
Bonus: Random consumable item (about Maya), EXP for whole party (about Shaman File)
If you've read the first "after leaving" page of the diary or seen Mimi's first flashback, you can ask Dagon about the last time she met Maya. Doing this will allow Mimi to have her second flashback. If you know of the Shaman File, you can ask her about it, but won't get any info.
Ask Attendant (Fortune Teller)
Time: 2 hours
Bonus: EXP for whole party
After asking Dagon about the last meeting, the attendant can tell you more about who Titi is at no cost. If you know of the Shaman File, you can spend time to ask her about it, but won't get any info.
Other Actions
Ask Old Carver (Whitelands)
Time: 4 hours
Bonus: Random consumable item
Will only talk after asking the snowman kid in the plaza. He demands proof that Maya is still alive before he'll say anything.
Present Evidence to Carver (Whitelands)
Time: 2 hours per piece of evidence
Bonus: EXP for whole party
After talking with the old carver, you can present evidence that Maya is alive. He'll accept the summoning circle (found investigating the altar twice) or Maya's Ring (found seeking the dragon four times).
Question Carver (Whitelands)
Time: 1 hour per question (5 total)
Bonus: EXP for whole party
Once you prove to the carver Maya is alive, he'll answer some questions. After asking him about everything (though the Maya's research question is optional), he'll tell you about how Maya might be in the Crystal Cave. Incidentally, asking him a question again costs no time.
Dig Up Spot (Whitelands)
Time: 6 hours
Bonus: Rim Fruit
You can dig up a spot in Whitelands 04 for a Rim Fruit. Serves no purpose to the investigation.
Missions
Me, the Leader?
Must have completed Karnel's "Can I Be Leader Too?" A special dungeon that unlocks Erena as controllable.
First, head toward the exit in the bottom-left. In the next area, use Aura Burst to get fire resistance and pass through the fire unharmed. Head right toward the top-right exit, dodging the icicles. Back in the bottom-right of the first area, there's a big mushroom. Cut it down to make a lily pad appear.
Backtrack to the start, then go up and around to where the new lilypad appeared. Hop across and cut down the mushroom, but don't go to the lilypads it makes just yet.
Head up from the area with the second mushroom to find stairs leading to another area. Go up to find a mushroom across some water. Aim a Flame Bomb to land on the lilypad and blow up the mushroom.
Back in the first area, head left to the new lilypads that appeared earlier. Shoot a Flame Bomb at the mushroom, timing it so it lands on one of the circling lilypads and explodes. Go up the new lilypads to the upper area. If you blew up the other mushroom earlier, you can hop to the goal.
After beating the dungeon, everyone gains EXP.
Likes and Dislikes?
An optional scene.
Cooking on the Road
Requires Silver Tableware and Ocean Blue, and unlocks the Cooking ally order.
Silver Tableware can be found randomly in the Northyne marketplace. Later on, it's also in the Erance marketplace with slightly better odds.
The recipe for Ocean Blue is sold at the Northyne bookstore. It's either Mist Quartz x6 and Gold Lump x1, or Deepsea Rock x2. (Alternatively, there's a blue chest containing Ocean Blue in Sacrifice Cave 05 if you successfully defeat Maya.)
Mist Quartz can be found in Crystal Cave. Gold Lumps can be made with Gold Ore, which can be found in Northyne stalls or Crystal Cave. Deepsea Rocks can only be obtained from fishing in a Chapter 5 town, so that's not the best for completing this as early as possible.
Chapter 5
Main Plot
Go to Erance Castle. 24 hours after the scene, go to the plaza.
Go to the bar in Port Fina to learn the Over-Water Boots recipe. Mist Quartz can be found in Crystal Cave and Sacrifice Cave. Deep Clay can be found in Gem Mine. Shelter Leaves can be found in Perplexing Waterside. Fullmetal Greaves can be bought from the Northyne armor shop, or forged from various Lumps with a recipe from the Northyne bookstore.
After making the Over-Water Boots, equip them on a party member and go south from Memoril Highway. In Memoril, go to the inn. Afterward, go to the Saint's Pharmacy.
Proceed through Lux Mountains. Go east on Luxefa Highway to reach Luxefa.
At the library, check shelves until Erena remarks she can't find anything. Ask the librarian about Faraway Dream and Port Fever. Leave Luxefa when you're done.
Either go to the inn and give Marinet the medicine, or just try to leave without her. (The former adds 4 to Marinet on the Girl Graph, and the latter subtracts 4. Note that the person opposite her will get the opposite change.)
Go east and use the Whiteflower Field map on Herb Garden. Make your way to the end.
Side Events
You can have some conversations with Frixis using the Projection Mirror during Chapter 5.
At the start of the chapter, you can have talks with the party members at the various homes. Marinet is at the Erance home, Karnel is outside the Faraway Continent home, Erena is outside the Erance home, and Mimi is at the Port Fina home.
"Bell Town Armonica" is available in the Past Archive. It's the first in a lengthy series of events which is currently not required to do, but probably will be eventually. See the Armonica Memories section for a guide.
There are three Magic Keys to obtain in Chapter 15, which is the first time you can get any.
- In a chest in Armonica Forest, accessible during the second/third Armonica memory or in the present day.
- With the Over-Water Boots, walk across the water in Windy Crossroads to find one in a chest.
- Go to the end of the path on the far right of Whiteflower Field: Swamp Region.
Things Magic Keys can unlock:
- The chest at Ellevark's old house in Port Fina. Contains a Magic Booster, head equipment that boosts MAG but increases MP cost.
- The optional Ragnarok Ruins dungeon on the Faraway Continent.
- Inside the Ragnarok Ruins, there's a 10% chance for a door to appear on each floor, and a 10% chance of a Magic Key chest within. It contains an Ouroboros Ring, which grants the Heal Circle skill to the equipper.
With the Over-Water Boots, you can explore some new parts of the Thieves' Hideout in the Erance slums and get a few chests. You can also get to a Willow Petal behind Frixis's house.
Armonica Memories
Bell Town Armonica
Leave the cathedral. You can optionally talk to the Glasses Lady on the street, find the key behind the cathedral (enter it, go east, then exit down), and take what's inside the water mill.
Go to Starry Hill and collect at least 5 Cosmotite. Make sure to check the little craters and colorful cracks in the wall. You get 1,000 Rill for each additional one you get. Once collected, return to the glass shop.
Go to the cathedral, enter the east hallway, and talk to the Pope. Return to the glass shop.
Espilce Day
Go around the festival. There's a target game with prizes at various score thresholds, and a lottery with various prizes. (The pool of items in the lottery decreases every time you win one, so you're guaranteed to eventually get everything for at most around 167,000 to 187,000 Rill.) When you're done with the festival, exit to the west.
Go north to the cathedral's back entrance. Go upstairs and proceed until you reach the Armonica Bell.
In the forest, head as far as west you can, take the left rock stairs, and work your way around to the northwest exit. (Notably, there's also a Magic Key if you go up the stairs near the start, through the trees, and behind the waterfall.)
Present Day
To access False Memories, you must go get some Chime Water in the present. Go to Armonica Highway in the Finstaria region and try to head east. The traveler will give you Chime Water. (You technically only need to pay her back if you want additional Chime Water.)
False Memories
Enter the cathedral. Go upstairs and proceed until you reach the Armonica Bell.
In the forest, head as far as west you can, take the left rock stairs, and work your way around to the northwest exit.
Present Day
Go east of Armonica Highway and through the forest to unlock Armonica. Go to the Glass Factory and talk to Stella's mom. Go behind the cathedral. Afterward, you can have another talk with Stella's mom.
Missions
Can I Be the Leader?
Must have completed Erena's "Me, the Leader?" A special dungeon that unlocks Mimi as controllable.
Go down to the crystal surrounded by scarecrows. Hit the crystal with Crystal Edge until it's destroyed and go left. At the end of the path of enemies is a chest with Claim Ticket A. To proceed, you can just push through and destroy the red crystal going back and forth at the bottom with Cold Vulcan.
Return to the scarecrows and take the new path right. Hit the switch and defeat the enemies. (Try to cluster them up and use Might Fingere to do lots of Light damage. Summoning Moby can help too, as their Heal Circle will do damage to undead.) Proceed with the magic circle to reach an area with a recovery circle which you can save at. Then jump in the hole.
Hit the top switch, then the bottom switch, and quickly run through to the right. Stand below the four switches and use Cold Vulcan to hit them all, then run down. You'll find Erena walking back and forth. When she's near the top, get close to her and use Party Block to "stick" to her as she walks through the flames, then let go at the bottom.
Proceed along. Hit the four switches and quickly run through. For the two groups of six switches, stand some distance above the bottom group and fire a Crystal Edge toward it, then quickly hit the upper group and run through. The attack should hit the bottom switches around the time you approach the blockades.
For the many scattered switches, stand exactly on the left tile and fire Cold Vulcan left, then stand exactly on the right tile and fire Cold Vulcan right. Run through.
In the final area, hit the switch to make enemies appear. Mimi can't damage them, so lure the red ones to the upper-left corner to be hit by Prison Sphere, and the blue ones to the upper-right to be hit by Flame Bomb. (You can pretty much go into the corner and guard.)
To get the final chest, use Summon Fenrir, fire a Crystal Edge toward the switch from as far away as possible, and immediately run all the way down.
A Man Who Knows Not Love
An optional scene and followup that unlocks the Girl Graph (though affection changes will go on behind the scenes regardless). Your choice in the second mission doesn't ultimately matter.
Got a Sorcerer Crystone!
A chance to change Ellevark's Element Graph. You can only change it once, but can back out and leave the mission there for later.
Chapter 6
Main Plot
As of version 0.75, you can't progress the plot in Chapter 6. But you're free to run around and do things, and there are some missions.
Side Events
You can have some conversations with Frixis using the Projection Mirror during Chapter 6.
At the start of the chapter, you can have talks with the party members at the various homes. Pia is at the Erance home, and the rest are outside the Faraway Continent home. (Talking with Pia and Mimi gives +2 to them and -2 to their opposite on the graph.)
Missions
Shop Upgrade Quatro!
Must have done both of the third-level shop upgrades and be at Shop Level 30. The Types upgrade requires 75,000 Rill, and the Capacity upgrade requires 4 Pharsnium, 1 Power Fragment, and 1 Mythril.
Pharsnium is minable from various places, with the highest odds being in Forbidden Mine. Power Fragments are similarly minable with best odds in Forbidden Mine, but can also appear in Erance stalls or rare chests in Crystal Cave.
Mythril is in various places (rare in Crystal Cave and Herb Garden, may be sold by Item Collector in Herb Garden), and you can get one guaranteed from a chest by using the Over-Water Boots in the Erance slums Thieves' Hideout.
Gotta Enlarge Storage
Must have done "More Storage!" Bring 6 Unknown Rocks, 30 Deep Clay, 1 Mythril, and a Traveling Pouch. This expands equipment storage to 700 and carrying capacity to 200.
Unknown Rocks are on Memoril Trail among other places. Deep Clay can be found in Gem Mine. A Traveling Pouch can be rarely obtained from normal or rare chests in Lux Plains.
Mythril is in various places (rare in Crystal Cave and Herb Garden, may be sold by Item Collector in Herb Garden), and you can get one guaranteed from a chest by using the Over-Water Boots in the Erance slums Thieves' Hideout.
Fill the Girl Graph! Part 1
Must have done "A Man Who Knows Not Love." Adds Pia to the Girl Graph.
Music
Below is a list of songs and their sources. Beware of spoilers!
Many of the source links are impossible to find, as a number of the sites have gone down. In fact, even more have gone down since I first made this list, so their links are crossed out.
The VaLSe MP3s are free to download, but require an account on the site. So when available, I also included the MIDIs which don't require anything.
The EXEs on the archived Enterbrain site are just self-extracting ZIPs, I swear. Don't ask me why they used that.
Do not reupload these songs elsewhere without permission from their respective creators.
Song List
| Chapter 1 | |||
| Name/Use | Original Name | Artist | Source |
|---|---|---|---|
| Sound of Piano | Back to That Time | matsui | N/A |
| Title | Moonlight | D'elf | Full |
| Setting Out | Cheerful Scene or Ordinary Days | VaLSe | |
| A New Chapter | ??? | ??? | N/A |
| Quiet and Serious | On a Summer Night -Piano solo- | McCoy | Full |
| Port Fina | On the Wind | Kamiki | N/A |
| Port Fina: Night | Tranquil | Masato | N/A |
| Port Fina: Map | Aiming for the Summit | Kazamitori | Full |
| Port Harbor | A New Sunrise | Rei Shimizu | Preview |
| The Usual 01: Generic | Free BGM TR-2 | D'elf | Full |
| Memoril Highway | Afterglow | wakaba | N/A |
| Belk Plains | Wind on the Plains | kai | Full (MIDI) |
| Exciting | ??? | ??? | N/A |
| Tending the Shop! | Gataux Sucre BGM | Tamaki Kinoshita | Full |
| Upbeat | ??? | ??? | N/A |
| The Usual 02: Relaxing | Free BGM TR-3 | D'elf | Full |
| The Usual 04: Joyful | ??? | ??? | N/A |
| The Usual 05: Nonchalant | Nostalgic Trip | purikoko | |
| The Usual 06: Calm | Straw Hat | OSTER project | N/A |
| Gag 1 | Baby Rendezvous | Shotaro Ishigaki | EXE |
| Gag 2 | ??? | ??? | N/A |
| D-D-D-Dark Lord?! | ??? | ??? | N/A |
| Heartwarming, A Little Silly | Workshop City | Sagamihara Armored Maid Troupe | |
| Mysterious | The Beginning of Long Story | Rei Shimizu | |
| Normal Battle | Battle 4 | Koji Takeshima | Full |
| Boss Battle 1 | Boss Battle 1 | ??? | Original |
| Boss Battle 2 | Heavenly Wings | Kazamitori | Full |
| Boss Battle 3 | When Swords Cross | YOKO | MIDI |
| Joyful | ??? | ??? | N/A |
| Sorrow | Snowy Landscape | SAM | |
| Mellow | ??? | ??? | N/A |
| Chapter 2 | |||
| Name/Use | Original Name | Artist | Source |
| Happening | ??? | ??? | N/A |
| Sort of Serious | Neo Folklore | HAK | |
| Port Coast | Can You Hear My Voice...? | Purgatory Garden | Full |
| Coastal Cave | DG"echo" | Sound Corridor Trial | N/A |
| Faraway Continent | Invisible Painting | HAK | Full |
| Faraway Continent: Night | Another Season Gone Around | Masato | N/A |
| Outside Ragnarok Ruins | ??? | ??? | N/A |
| Sage's Cave | skim snow | LaLa | Full |
| Sage's Chamber | Snow | HAK | |
| Quiet and Serious | ??? | ??? | N/A |
| Heavy Dark | (Title Unknown) | HAK | Full |
| Chapter 3 | |||
| Name/Use | Original Name | Artist | Source |
| Finstaria | The Color of Wind and Plains | Hiroyuki Oshima | |
| Finstaria: Night | That Day | HAK | |
| Finstaria: Map | Reeds Flying Up With the Wind | Tamaki Kinoshita | |
| Windy Highway | MEGALITH | NABEMON | |
| Finstaria Grasslands | Clear | Sound Corridor Trial | N/A |
| Romack Woods | Frozen Forest | Azell | Full |
| Forest of Death | A Girl's Wish | D'elf | Full |
| Rand Mountains | Daily | Jin Rokudo | Full |
| Eerie | ??? | ??? | N/A |
| Charge | Charging Song | Kazamitori | Full |
| Valgido's Domain | ETERNITYSCAPE | HAK | Full |
| Victory | Squadron-Like BB | Silent Hunter | |
| Chapter 4 | |||
| Name/Use | Original Name | Artist | Source |
| Heartbreak | Under the Sky | Azell | Full |
| Erance | Time-Weaving Bells Reach the Sky | Tamaki Kinoshita | Full |
| Erance: Night | Lost | Tamaki Kinoshita | Full |
| Erance: Map | Harvest Dance | Kotori | |
| Popull's Theme | C-a-t-n-i-p | D'elf | Normal Long |
| Fenny's Song | Perche dolce caro bene... | Keiko Ishihara | |
| Tension | THE WAR | NABEMON | |
| Memory | ??? | ??? | N/A |
| Erance Castle: Peace | Hero's Triumphant Return | NABEMON | |
| Erance Castle: Barracks | The Old Castle's Knights | Masato | N/A |
| Erance Castle: Court Ward | Temple of dark clouds | C2K | Full |
| Capital City Sewers | ??? | ??? | N/A |
| Silmina's Theme | Iruma, the Spirit Carrying the Night | HAK | |
| Attack | Assault | NABEMON | |
| Crowa Battle | Go Without Seeing Back! | Makoto Saita | |
| Chapter 5 | |||
| Name/Use | Original Name | Artist | Source |
| Whitelands | Forest Path | VaLSe | MIDI MP3 |
| Mimi's Theme | ??? | ??? | N/A |
| Northyne | Bonds | Rei Shimizu | Full |
| Northyne: Night | Ever since, Evermore... | HAK | Full |
| Northyne: Map | Iruma Image Rough 2 | HAK | |
| Fortune Teller | Suspicious Guys | Sound Corridor Trial | N/A |
| Cleri Road | Wind Grass Highway | VaLSe | N/A |
| North Snowfield | Over the Horizon | HAK | |
| Northyne Harbor | Moonlight Cocktail | HAK | |
| Sad Scene | Bubble | Iria Hyouseki | Full |
| Altar Path | Icicle | Ine Nakamura | N/A |
| Very Serious | DEATH TONE | Purgatory Garden | Full |
| Ice Temple | Fox Hunting | HAK | Full |
| Chapter 6 | |||
| Name/Use | Original Name | Artist | Source |
| King of Erance | ??? | ??? | N/A |
| Mystical | Blue Air | Sagamihara Armored Maid Troupe | Full |
| Perplexing Waterside | Fairies of the Deep Woods | Hideki Yanagisawa | EXE |
| Erance Ruins | sin a sin | Ine Nakamura | N/A |
| A VIP Enters! | A Dreadful State of Derangement | Ine Nakamura | N/A |
| Slums | Old Illusions | Masato | N/A |
| Thieves' Hideout | MOON ~Secrets of the Abyss~ | NABEMON | N/A |
| Evening | ??? | ??? | N/A |
| Chapter 7 | |||
| Name/Use | Original Name | Artist | Source |
| Past Archive | Amnerika ii | Ryo Lion | N/A |
| Moon Memories | Memories of the Moon | VaLSe | MIDI MP3 |
| Lady Remi | Ruinous-Eve | HAK | Full |
| Chapter 8 | |||
| Name/Use | Original Name | Artist | Source |
| Halfbeast Forest | Young Maiden on a Portable Shrine | Tamaki Kinoshita | |
| Sun God's House | ??? | ??? | N/A |
| Distant Wastes | Thousand Miles | Hideki Yanagisawa | N/A |
| Melancholy | Countryside | HAK | |
| Necrovia Battle | EMBLEM BATTLE | Takumi | Full |
| Chapter 9 | |||
| Name/Use | Original Name | Artist | Source |
| Luxefa Moderato | The Warring State Period | Kotori | |
| Battle Against Erance | Brave General Tomitake | Ine Nakamura | N/A |
| Sage's Path | When You Know Love, You Know Sorrow | Silent Hunter | Full |
| Remi Battle | Headache | Ine Nakamura | Video |
| Chapter 10 | |||
| Name/Use | Original Name | Artist | Source |
| Pretty Sentimental | Scars | Yo Nishida | Full |
| The Last | Last Sanctuary | Hiroyuki Oshima | Full |
| Ending | A Chance Meeting in the Sky | Tamaki Kinoshita | Full |
| Soundtrack | eden. | Tamaki Kinoshita | |
| Ghost | ??? | ??? | N/A |
| Chapter 11 | |||
| Name/Use | Original Name | Artist | Source |
| A Quiet New Chapter | ??? | ??? | N/A |
| Flashback | Water Clock | Tamaki Kinoshita | |
| Wheat Fields | Raindrop Footprints | purikoko | Full |
| Tower Ruins | Stream D | ju-nya | Full |
| Chapter 12 | |||
| Name/Use | Original Name | Artist | Source |
| Sage's Cave: Warped Path | INDEUS | HAK | |
| Seriously Serious | ??? | ??? | N/A |
| Tragic | Goodbye | Jin Rokudo | Full |
| Chapter 13 | |||
| Name/Use | Original Name | Artist | Source |
| 'Twas Elegant | ??? | ??? | N/A |
| Ragnarok Ruins | Age Of Ondins (Remake) | mozell | Sample |
| Chapter 14 | |||
| Name/Use | Original Name | Artist | Source |
| Crystal Cave | Deep Ice Cave | purikoko | Crossfade |
| Strong Enemy Battle | Battle of Marion | mozell | Video |
| Nostalgic | ??? | ??? | N/A |
| Deep Impression | ??? | ??? | N/A |
| Chapter 15 | |||
| Name/Use | Original Name | Artist | Source |
| Armonica | New Term | M/K | Full |
| Starry Hill | Chat | Takuto Yoshida | Full |
| Espilce Day Festival | ??? | ??? | N/A |
| Unchanging Tragedy | ??? | ??? | N/A |
| False Memories | Millennium Hourglass | M-ART | Full |
| Everdark Highway | Passing each other | mozell | Video |
| Memoril | nothing really... | mozell | Video |
| Memoril Lake | ??? | ??? | N/A |
| Lux Mountains | Labyrinth of Sunshine | mozell | Sample |
| Luxefa | Dear My Dear | mozell | Video |
| Luxefa: Night | Dear My Dear | mozell | Video |
| Whiteflower Field | Amemomori | mozell | Video |
| Feelin' Good | ??? | ??? | N/A |
| Miscellaneous | |||
| Name/Use | Original Name | Artist | Source |
| Good Night | st002 | watson | Full |
| Fanfare | Fanfare 3 | kai | Full |
| Fanfare 2 | Fanfare 2 | kai | Full |
| Grand Fanfare | A Step Toward the Strongest | Kotori | |
| Game Over | ??? | ??? | N/A |
Translation Notes
(These contain spoilers for all aspects of the game. Only read after you've beaten it fully.)