Midnight Puppeteer is a puzzle-solving exploration game by Mascarpone made in Wolf RPG Editor.
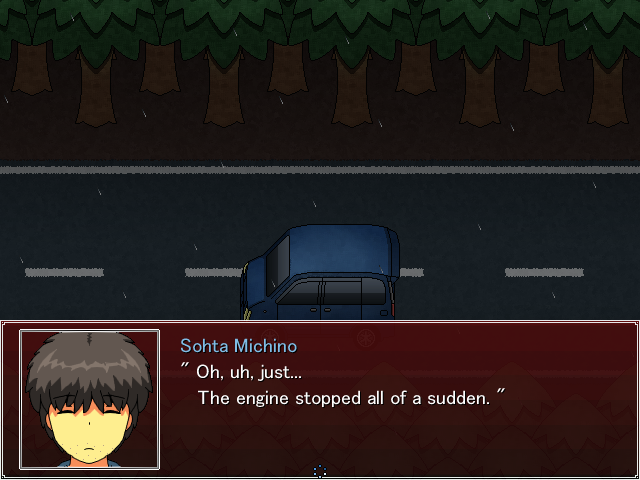
Mayo and her teddy bear Mister Masper are being driven home one night, when suddenly the car's engine stops.
Her father heads down a nearby path to find help, and when he doesn't return, Mayo and Masper decide to follow.
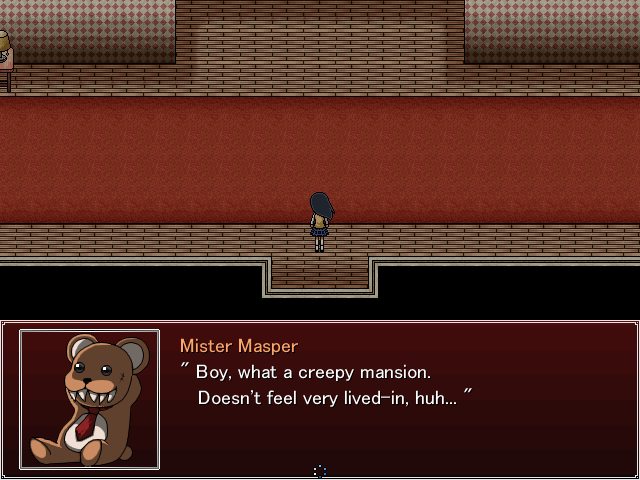
There, they find a large mansion. And in the search for Mayo's father, they find much more...
The latter half of the game has quite a few lengthy cutscenes. Mascarpone recommends not playing if you don't want to deal with that.
(Content Severity: Mild)
Click here for content warnings.
Offscreen animal death.
A minor horror scene.
Some mild swearing.
Download Midnight Puppeteer 1.08 | (Mirror)
(Chrome may falsely flag the download as malicious, but it's safe to ignore.)
Supported Platforms
The game's engine is made for Windows only, with no native support for other platforms. To play on Mac, you can try a general-purpose tool like WineBottler.
Troubleshooting
Make sure to extract the game to its own folder instead of running directly from the ZIP file. If you don't do so, any saves made will be lost the next time you run the game.
If dialogue doesn't show up or uses the wrong font (which may cause cutoff text), download and install MS PGothic.
Screenshots
Walkthrough
I've provided a walkthrough if people get stuck. Click or highlight the black boxes to show spoiler text.
Walkthrough
Floor 1
Follow the path and enter the mansion. Enter the first door on the left and get the Bat.
Enter the second door on the right and use the Bat on the sofa (equip it and check the sofa) to get the 1F East Room key.
Open the far-right door with the key.
Hint:
Turning off the lights with the far-left lamp makes it extra dark. Could this be helpful somehow?
Answer:
Having the darker lighting reveals a hidden code on the car painting. Go in the first door on the right and enter it into the safe: 1008
Use the Rec Room key to open it (either of the two leftmost doors). Take the screwdriver from the bookshelf.
Go to the far right in the entrance hall and use the screwdriver to open the vent. Crawl through and pull the lever.
Back in the entrance hall, take the elevator to 2F.
Floor 2
Use the screwdriver on the vent over on the right and check it for the 2F West Room key.
Unlock the big room on the left side with the key. Check everything in the room. Check under the desk one to the right of the top-left desk for a key.
Unlock the far-right door with the Reference Room key. Check the right wall, and you'll find it sounds hollow; destroy it with the Bat. Enter the back room and pull the lever.
Back in the main hall, take the elevator to 3F.
Floor 3
Enter the room on the top-left. Proceed through the vent, and get the watering can and the 3F East Room key inside it.
Go down to 1F and leave the mansion. Fill the watering can at the puddle. (If you didn't use the key yet, you'll lose it here, which locks you out of getting a hint for the following puzzle.)
Water the vases with wilted plants on each floor. 1F's is in the Rec Room on the left, 2F's is in the west room, and 3F's is in the room where you got the watering can. This unlocks the security room, the bottom-right door on 3F.
Pull the lever in the security room, then take the elevator to B1F.
Basement
Pick up the photo on the ground. Go right and read the story on the wall in the far-right room to get the B1F West Room key.
Unlock the west room with the key. Go to the lower-left section and read the diary, then follow the instructions. If you mess up, read the diary again to restart.
After reading the diary, go right twice (no watering necessary) to see the shadow. Head to the top-right to see it again. Go left to the billiards table, then down to the carpet to see it again. Go left, through the cell door, and to the upper-left. Check the note for a hint.
Hint:
Once you have the "slow to fast" hint, remember where you might have seen four clocks in a row.
Hint 2:
The top-right room on 3F has four clocks showing different times. Putting the times together gets you five digits - now in what order do you arrange them?
Answer:
The code for the panel in the red carpet room is 91087.
After putting in the code, get the glass plate from behind the TV. Head right to the Pink Panda painting and put the plate on. Go right and enter the now-open door.
Dungeon & Watchtower
Head to the bottom-left of the dungeon area and go up the stairs.
Go through the maze of red balls for a key. Check the message near the entrance to reset it.
Maze Directions:
Push ball up. Push next ball up. Push next ball left twice, go down. Push next ball right. Push next ball left twice. Push ball above you up. Approach the lower ball (in the middle of the four-way intersection) from the top and push it down. Lastly, go to the ball on the left edge and push it into the pit.
Open the door in the top-right of the courtyard with the key. Open the box for a shovel.
Hint:
There are two equations on the floor of the dungeon and storehouse: 12 * 3 - 6 = ?, and 2 x 2 x 2 = !. Then there's another hint that connects them.
Answer:
The code for the panel near the dungeon stairs is 240. After unlocking the cells, the top-right cell has a hint.
Answer Part 2:
Use the shovel to dig into the left eye of the skull pattern in the dungeon. Remember, the skull's left eye, so it's your right.
Use the Connecting Passage key to open the door in the storehouse. Open the vent with the screwdriver.
Shove the statue toward the wall, then approach the clock on the right and it'll fall off the wall. Take the veranda key from the back of it.
Open the door on the top floor of the tower with the veranda key. Get the hammer.
Return to the connecting passage and break the cracked wall with the hammer. Go through and get the chocolate.
Go back to the veranda and put the chocolate on the bird feeder. You can then safely cross the rope outside the second floor of the tower.
In the suspended ceiling room, the safe and the visible door are pointless. With the top-down diagram, you can tell there's another door - stand in front of the second pillar, face "down," and check for a door there.
Mansion Annex
Head for the big main room and enter the auditorium through the center door on the bottom floor. Go through the maze for the Annex 1F East Room key.
Maze Directions:
Push ball up. Push next ball right twice. Push ball above you up. Go left and push next ball up. Push next ball down. Push the ball above you up. Push the ball to the right up. Head right and push the ball right three times. Go down and push the ball on the right to the right.
Open the bottom-right door with the key. Go to the right side of the room and have Masper get the Annex 1F West Room key from on top of the closet.
In order to light the candles from right to left, re-enter the room and use the secret door in the wall, above the green chair. Then walk past the candles. This opens the closet, where you can change clothes. This is totally optional, though.
Open the bottom-left door with the key. Open the box on the left for the Annex 3F West Room key.
Open the top-left door with the key. Check the crane game controls. Talk to Masper through the glass, then check behind the top-right pillar for an extension cord.
Go to the bottom-left room, use the extension cord to connect the machine to the plug, and play the game. Get all three questions right for the Annex 2F West Room key.
Game Answers:
There are seven sets of questions. It starts with the first, and advances to the next each time you play.
1. Carrot, Snowman, Croquet mallet
2. Snowman (red gloves), Yamamba, Stuffed bear
3. Carrot, Chocolate ice cream, Stuffed bear
4. Croquet mallet (14 points), Snowman (smiling), Strawberry ice cream
5. Strawberry ice cream, Bear, Chocolate ice cream
6. Snowman (blue bucket), Yamamba, Stuffed bear
7. Snowman (Teddy bear (Yamamba)), Strawberry ice cream, Chocolate ice cream
Open the middle-left door with the key. Equip the Hammer or Bat to break the pots, and threaten the pig on top of the shelves with it for a 100-yen coin.
Return to the top-left crane game room. Put the 100-yen coin in the slot. After the scene, check the crane controls again.
Go into the middle-left room to look for Masper, then leave. Follow the person you see and enter the now-open top-middle door.
(Cutscene Break)
As Sohta, leave the room and check the right wall for a secret passage. Go into the bottom-middle door and talk to Kamikura next to the piano. Eventually, you have to say you trust him.
Go to the top-middle room and take the ladder, then proceed out into the forest.
Forest
When you come to a hole, bridge it with the ladder. (If you use the branch, it'll just break, so replace it with the ladder if you do that.)
Proceed until you reach a maze-like area. Read the note on the wall for directions. If you wander long enough, Mothbee will appear to give you another hint.
Hint:
The key is in identifying which "four-way crossroads" is being referred to. These are clearly marked by the brown patches in the center of each.
Answer:
The correct intersection isn't in the small maze area on the left, but the large area on the right. Following the directions from there takes you to the previous screen, where checking the left wall gets you a rope. Use it to go down the well in the maze area.
Proceed through the forest areas until you reach a locked door. Head back and take a right at the earlier intersection.
Answer:
Step on the brown patches to summon crows at the two positions matching 2:45 on a clock: the patch two spaces clockwise from the top patch (2 o' clock), and the far left patch (9 o' clock). Take the key and use it on the door.
(Cutscene Break)
Take the right path and chase down the boy. (What you say to him doesn't have any real impact.) Afterward, proceed through the forest.
Mrs. Kishikawa's House
If you push a pedestal from the right room on the second floor out into the hall, over to the top-left corner, and climb up on it to reach the cardboard box, you can change into more outfits. Again, this is totally optional.
Go upstairs. Enter the right room and push the pedestals around to reach the Nursery key. Open the left room with the key and search for hints. Go downstairs and open the safe with the code: 0709
(Cutscene Break)
Use the drawer key to open the desk drawer in the nursery.
(Cutscene Break)
Forest
Proceed to Keito's grandma's house.
(Cutscene Break)
Sneak past the youth club members, waiting for the right timing so they won't see you.
General route to take:
Go to the bottom-right corner when the boy isn't looking. Walk through the part of the lower-left field that doesn't have plants (so it doesn't make a sound). Once you get above him, enter the house and enter the well.
Just observe the pattern of the three guards going around in circles to find a good path through.
With the girl traveling a vertical corridor, hide in the side areas and remember that she looks up at each intersection. Make sure you go to the left for the last one, because she'll check the right.
For the final part, following behind the guards is probably the safest way to avoid being seen. The guard looking up and left repeatedly makes it impossible to take the low route, so go around the top.
(Cutscene Break)
You should figure out the chase for yourself, but if you want to ruin the fun:
Up, down, middle, middle, either, down.
(Also, if you fail the chase five times, Mothbee will warp you to the end.)
(Cutscene Break)
Mobiac Farm
Check the closed gate on the left, then check the map that appears on the ground. Enter the building from the load entrance hidden behind the truck.
Go to the second floor and into the top-right door for several hints on what to do.
First of all, go to the bathrooms on the right side of the second floor. Enter both bathrooms and flip all the stall toilet seats up. This puts a box of outfits in the bathroom hall.
To enter certain rooms, you must be wearing an outfit with the appropriate color: clerks wear black (maid uniform), workers wear beige (school uniform), and cooks wear white (white nurse gown or ballerina).
The office has a terminal to release the electronic locks, but it won't work until an error in the cultivation room with the capsules is resolved.
Answer:
Put on the yukata and pour the water from the free water balloon into the funnel in the capsule room. Then put on the maid uniform so you can go to the office (behind the front desk) to open the locks.
Switch to the school uniform and enter the boiler room (leftmost door on the first floor). Get the Mobiac bait in the corner, then get the boiler turned on.
Hint:
A diagram in the capsule room shows the pipe layout. Figure out which parts of the pipe should be open to connect the two sides, and turn the handles to light the lamps on those parts.
Answer:
From left to right, light the top (only) lamp, the top lamp, and the bottom-most lamp. Then press the button on the touch panel.
Go to the far-left room on the second floor.
(Cutscene Break)
Check the machine at the top of the room to open the lid on the container to the left. Look inside to get a ton of items.
Talk to the girl in the bottom-center (the one who's talking with a boy) until she asks for something to write with. Give her the Notepad and Ballpoint Pen. She'll give you a wrench.
Give the Wrench to the boy by the left wall, and get Mobiac bait from him. Use the bait on the swarm of Mobiacs on the right.
Use the screwdriver to open the vent in the top-left, behind where the Mobiacs moved to. Crawl through the shafts and press the switch, then leave.
(Cutscene Break)
For the final chase, try to pull ahead next to the truck; once you get far enough ahead without being knocked back, you'll have succeeded. The truck will leave itself more "open" the less hearts you have, so it may help to get hit on purpose.
Bad Endings
Bad End 1:
When you first gain control of Sohta in the mansion, rather than finding the secret door to reach the main part of the annex, take the obvious passageway (one of the boxes in the maze has a unique appearance and can be pushed) to return to the entrance. Leave the mansion and go back to the car.
Bad End 2:
During the chase scene with Miren and Shun on the path to the Mobiac Farm, at the part with the destroyed sign where the paths merge, take the top path, then turn around and go backwards using the bottom path. (You'll just get caught if you do it the other way around.)
Translation Notes
(These contain spoilers for all aspects of the game. Only read after you've beaten it fully.)